Hi, everyone! It’s Jenn from Endlessly Inspired again, and today I have a super fun project for you that is so easy, even kids can do it!
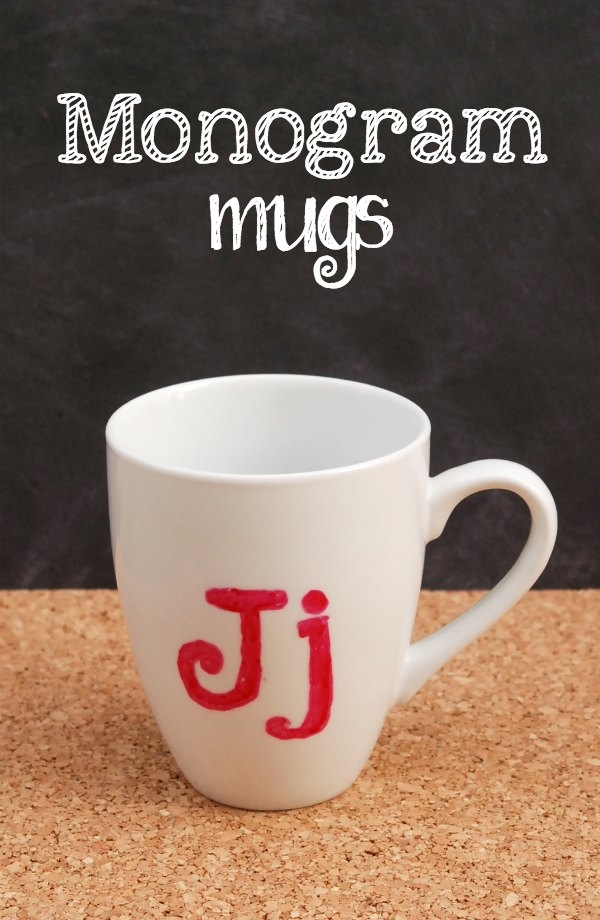
Seriously. My 9- and 6-year olds made these monogram mugs for their end-of-year teacher’s gifts this year.
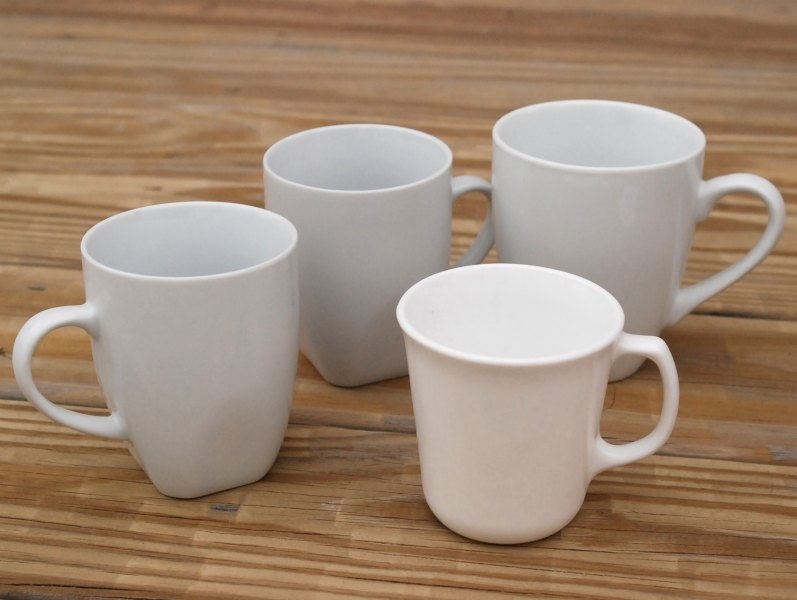
Not only are they crazy-town easy to make, but they’re super cheap. All you need are some plain white mugs {we got ours for less than $1 a piece at Goodwill}, and a paint pen that is designed for glass and/or ceramics. We used a DecoArt Glass Paint Marker that we got at Michael’s, but there are lots of different brands out there. What I love about the DecoArt markers is that, once you bake the mugs according to the directions on the marker, they’re even dishwasher safe!
There are tons of tutorials for mugs like these out there, but my inspiration was from Design Mom, who in turn was inspired by one of my favorite stores ever, Anthropologie. She used hers as Father’s Day gifts, but when I saw them, I immediately thought of teacher’s gifts. And my kids went crazy over the idea.
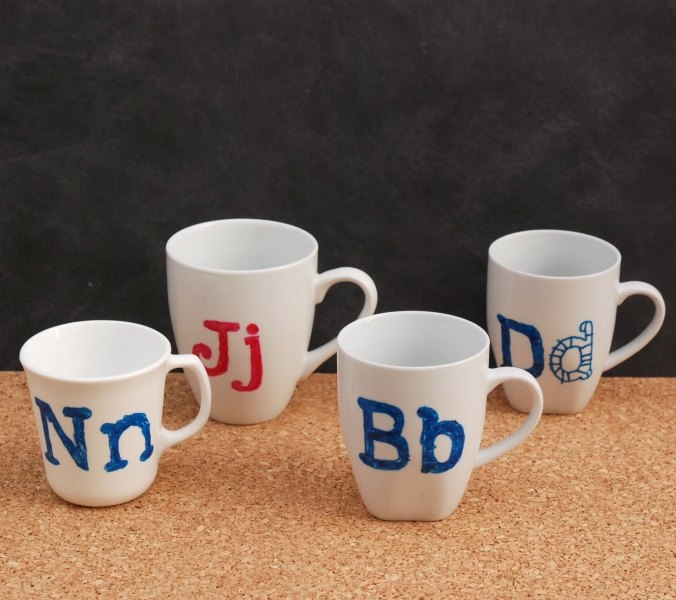
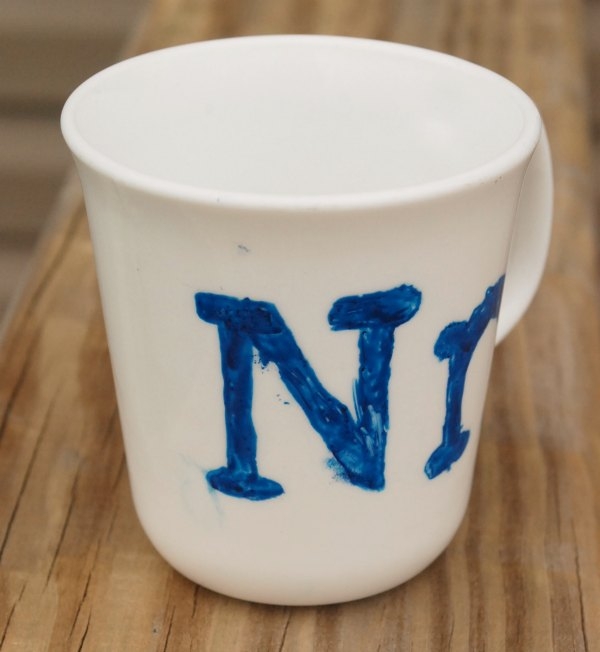
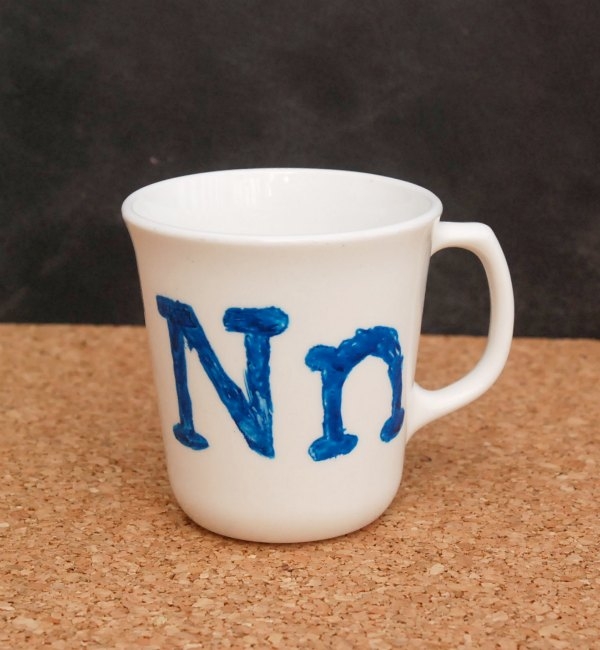
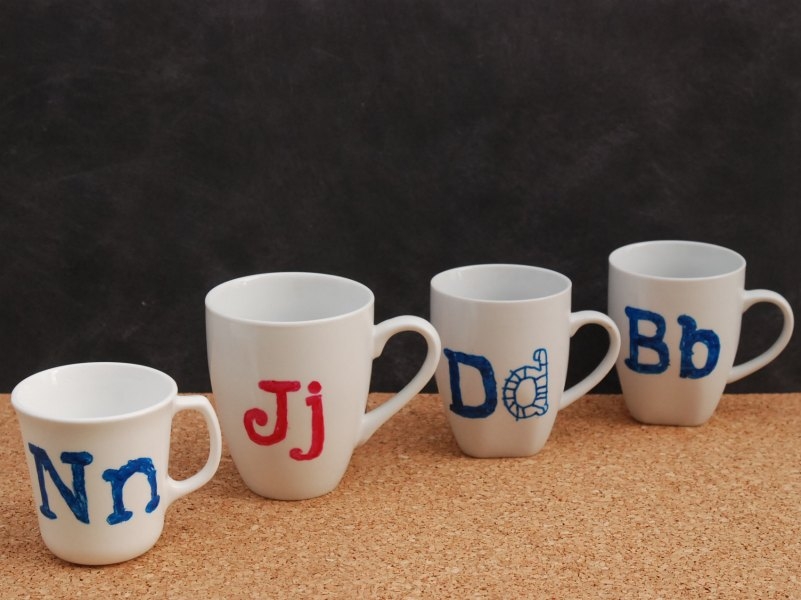
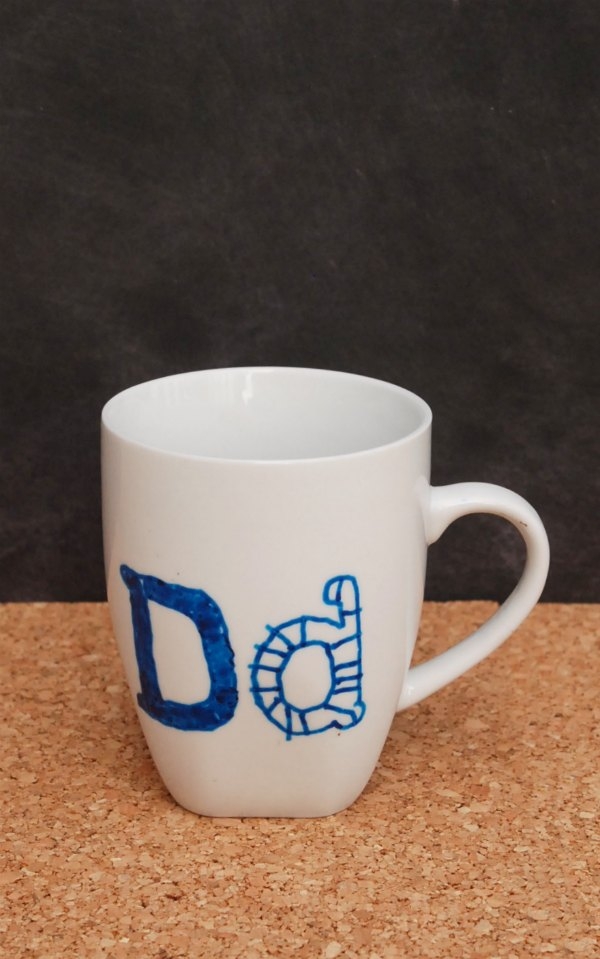
We went to Goodwill and they got to pick out the mugs that they wanted to use for each teacher. We decided that we were going to use both a capital and lowercase letter on each mug, because, as Connor said, “It looks teacher-y.”
Then we just printed out our letters and used the same transfer technique that I used on my Peace on Earth Globe. {Sorry for no picture, but the boys were so excited to get started on their mugs that I didn’t get to take one.} Basically, just color over the back of your paper with a pencil, flip it over, tape it to the mug where you want your monogram to be, and then trace the letter’s outline with a pencil or pen. The outline will then be transferred to the mug. {You could also use transfer paper or carbon paper for this step, or if you’re super fancy-pants, you could freehand it.}
Then just grab your marker and go crazy! I outlined the letters for them, and they filled them in. {Yes, Connor is in fact wearing a Magnum P.I. shirt, and yes, I do realize the awesomeness of this.}
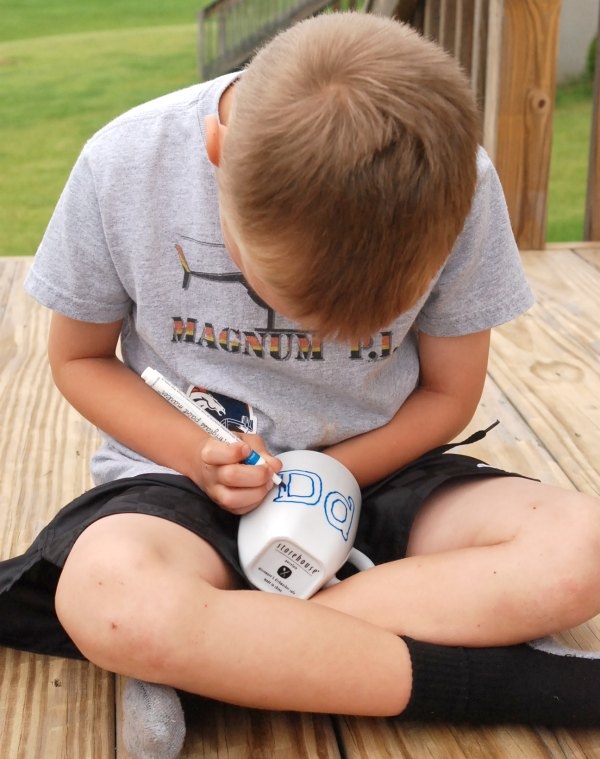
They took this job very seriously.

Don’t worry if you get some smudges or random marks on your mug, they’re really easy to clean up before you bake them.
Just get a damp Q-tip and wipe up anything you don’t want on there. This is a good way to clean up any transfer lines or smudges that may still be on there.
See? All better.
Once you have them looking like you want, set the paint according to the directions on the marker. For the markers we have, we allowed the paint to cure overnight {the directions said approximately 8 hours}, then baked them at 375 F for 40 minutes in a non-preheated oven.
The boys were so proud of these mugs, it was the cutest. They kept saying, “I can’t believe we MADE these!”
Connor wanted to switch this one up and do one filled in and one with lines.
I just love this idea, because the possibilities are practically endless. You could do a whole name, or shapes, or a picture … whatever you want!

What would you make these for?
Thanks again to Julie for letting me be the DIY contributor for White Lights on Wednesday. I love having the opportunity to share some fun DIY ideas each month! For more from me, visit my blog, Endlessly Inspired, and follow me on Pinterest, Facebook, Twitter and Instagram!
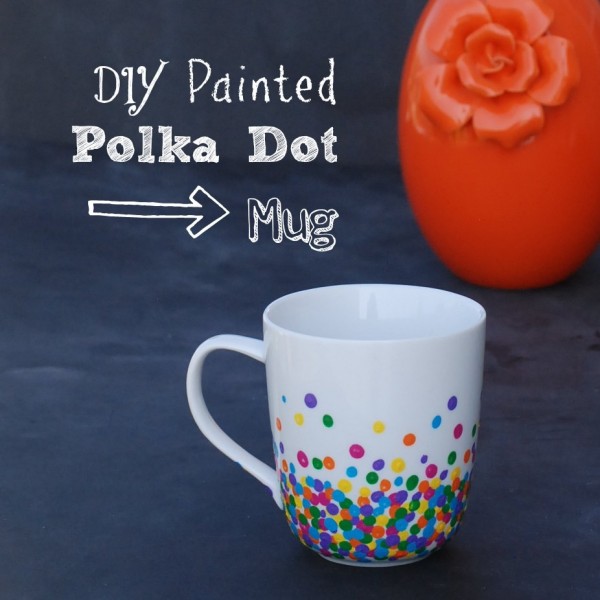
If you’re looking for another DIY mug project, check out my DIY Painted Polka Dot Mug!