Today is kind of a big day. I’ve been sitting on this post forever. I’ve been thinking about sharing it, and just hadn’t. So today’s post is my first big DIY project – our kitchen table makeover…twice! And the hard versus easy way to repaint your table.
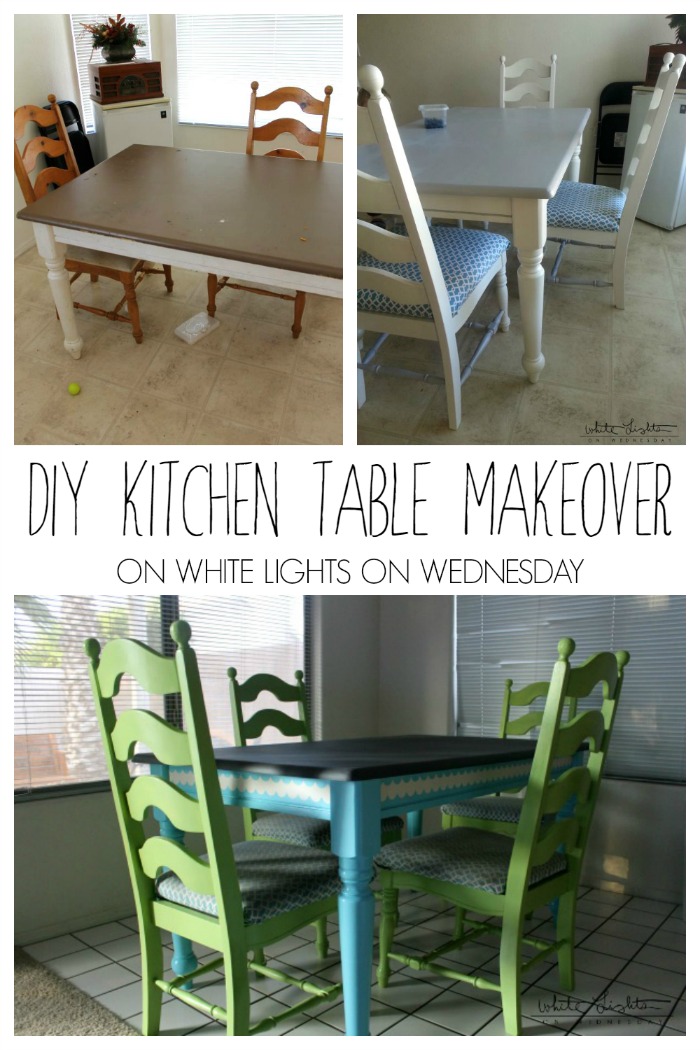
This table has been with Mike for 12 years. I’m not kidding. He bought it when he lived at the bachelor pad,with 2 other guys = table and chair abuse. The table actually did pretty well, the biggest victim were the seat cushions, but we’ll get to that. When we moved out of the Cobblestone house, on our own after having Otto, Mike left the table with his roommate Kyle. Kyle and his wife started to repaint the table. They gave it a brown top (from stained wood), and painted one of the chairs white. Then they decided to get a new table. We took the table to our house.
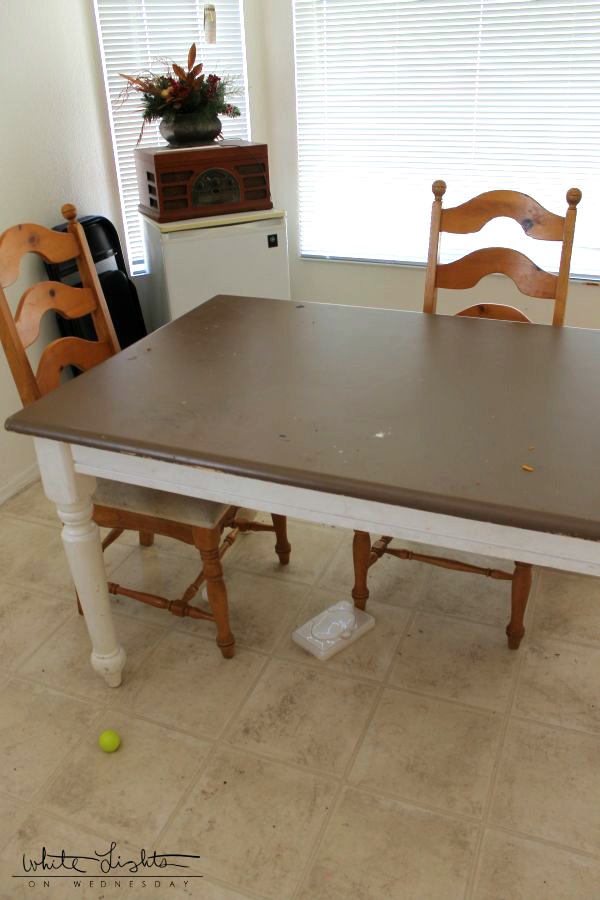
We left the table as is for a while. And then one day I couldn’t take it anymore. The seats were too hideous (see below). Otto was getting big enough to sit at the table, and I wanted a fresh start for it. I decided to overhaul the table. A few people asked why I didn’t just buy a new table. It’s sentimental to Mike, and it’s kind of the perfect size for our family.

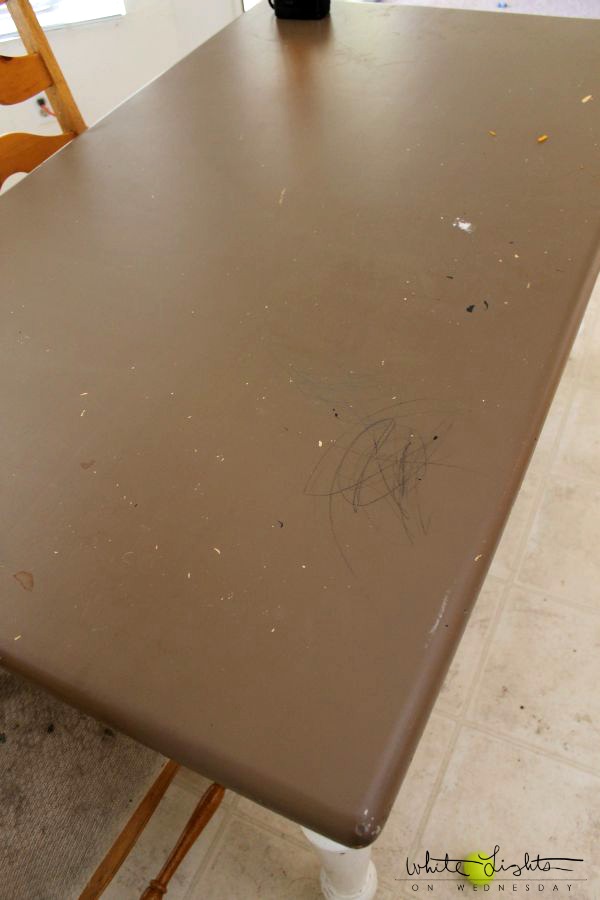
{OMG. This was seriously in our house. The only reason I’m showing you this is because it was years and year ago}
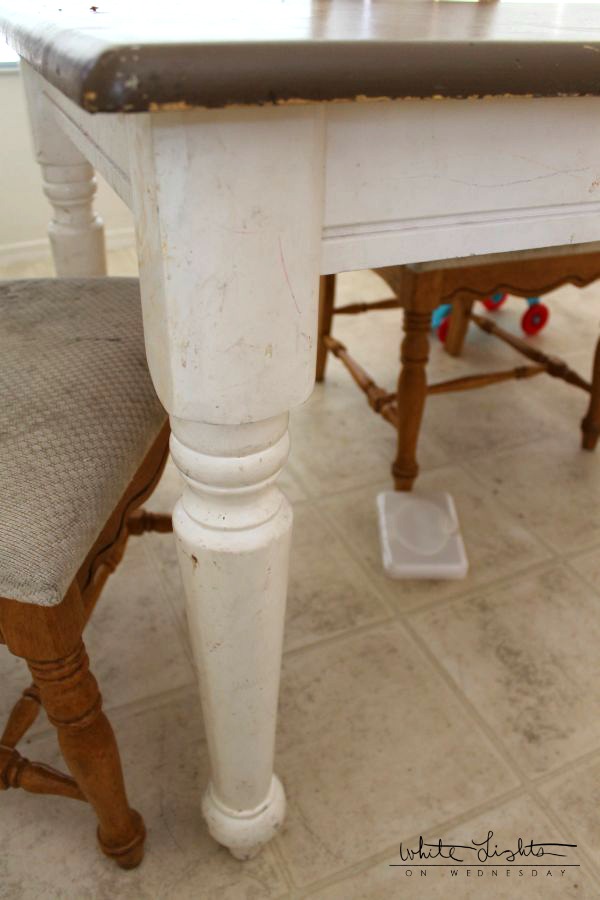
{Chipped paint. The morning before these pics Otto found a crayon and went to town while I was in the bathroom. Awesome.}
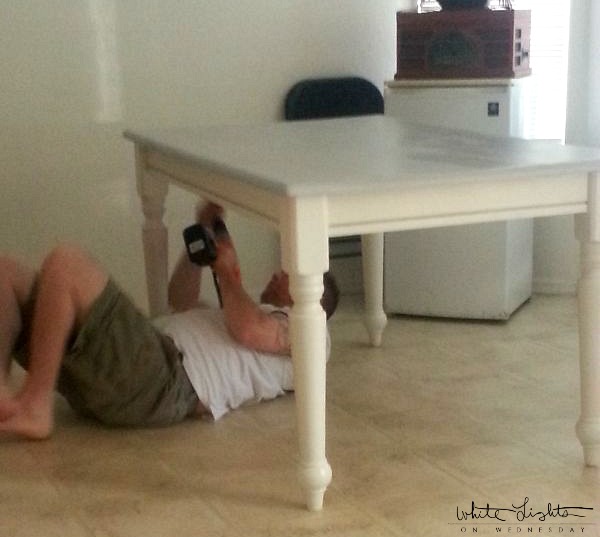
I had decided I wanted to start from scratch. I was going to sand off the years of build up (paint and stain) on the table and chairs. I borrowed my step-dad’s power sander and got to work stripping down everything.
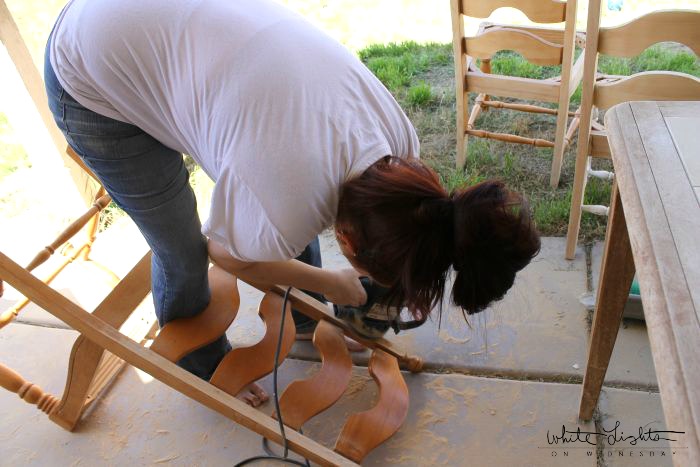
I grabbed Mike to help sand the smaller spaces the power sander couldn’t fit into. We tried a Dremel at one point, just it left weird grooves because I’m not a Dremel pro.

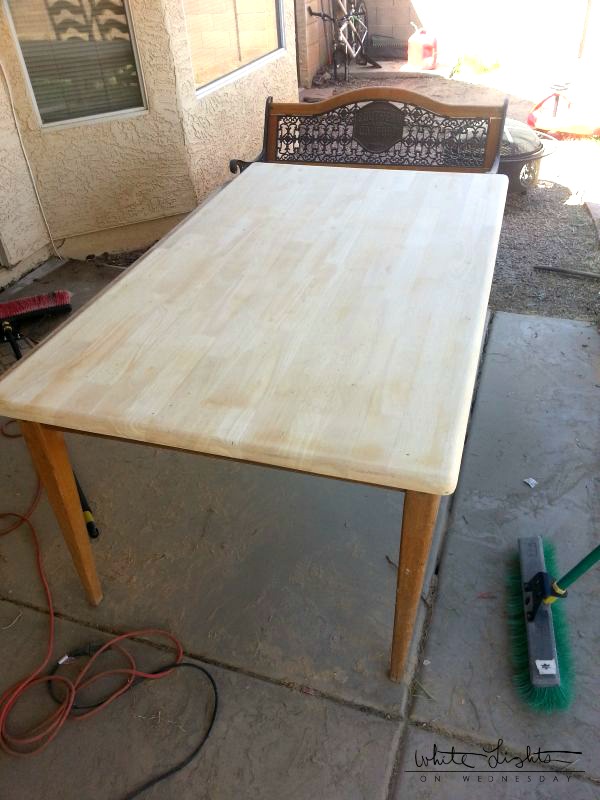
Sanding the table top was actually kind of fun. It was big and smooth, and I almost left it the natural wood color. This was my favorite sanding project. Which is saying something because I never wanted to see another piece of sand paper for the rest of my life after that week.
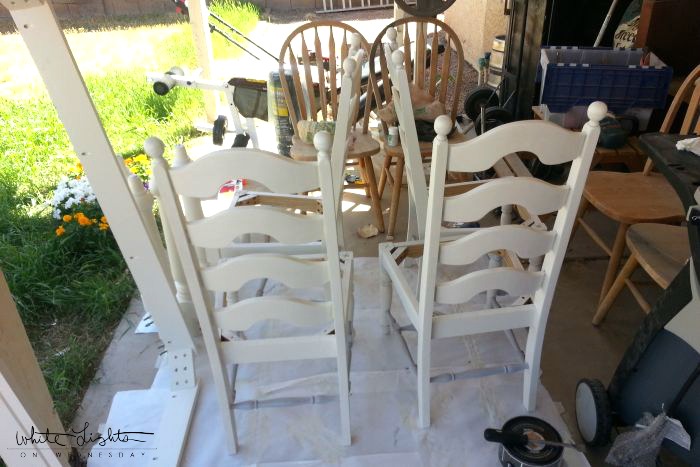
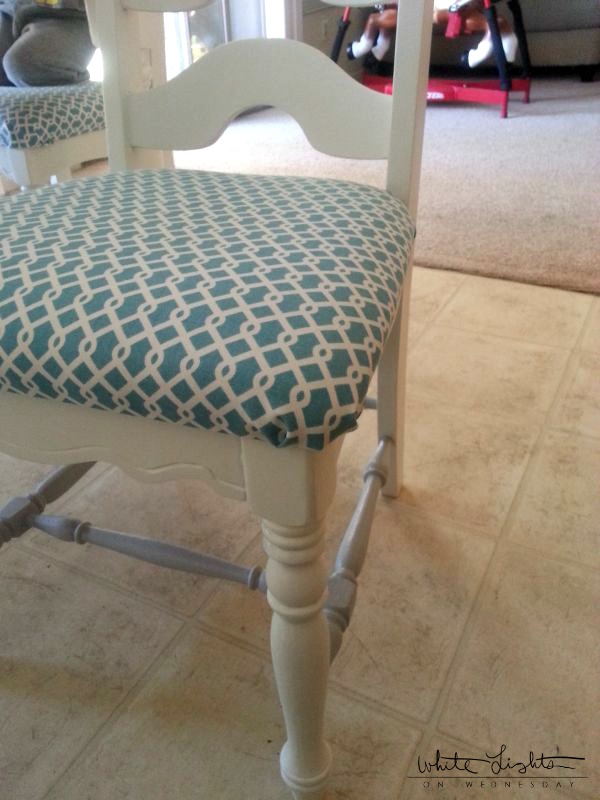
I decided to paint the chairs a slightly off white color. The paint complimented the fabric I had bought (and I totally wasn’t thinking about kid mess and white paint.) It took a couple coats, but it looked so nice and fresh. The stretchers, I painted grey. It’s the color I used for the tabletop, and the accent are on the table. {And I totally just googled “parts of a chair” so I could call the stretchers the right name.}
I got Mike to put the table top back on the base, and we were almost in business!
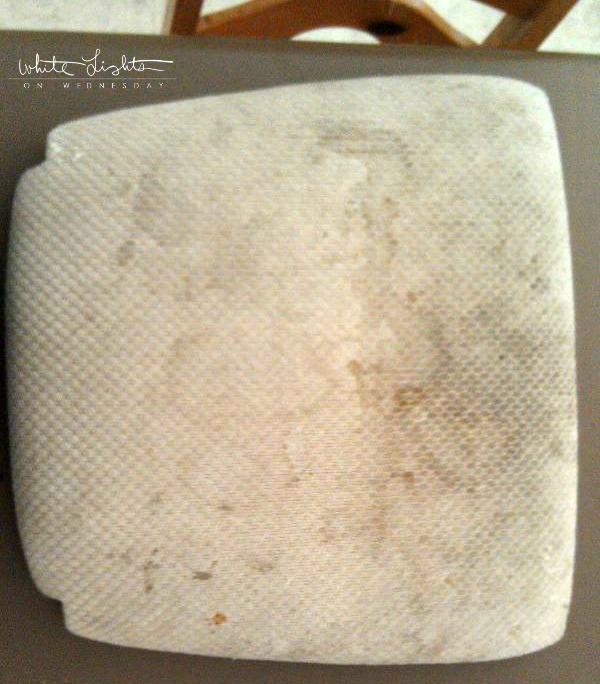
The last offending pieces were the cushions. OMG. So gross!! Spilled beer, and knows what else from almost a decade of bachelor house shenanigans.
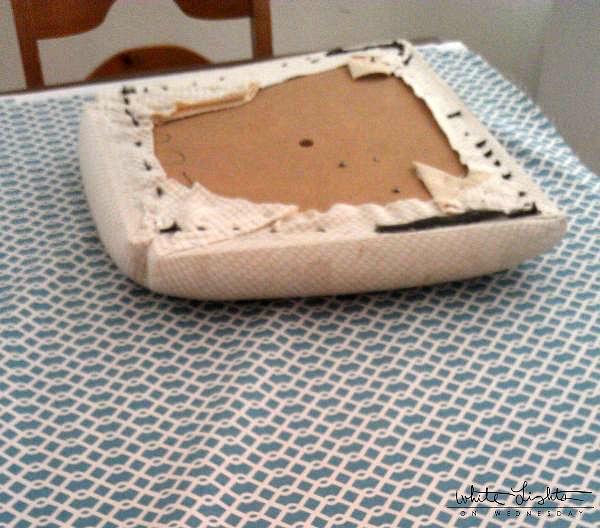
I bought a pretty blue and off white fabric, laid it out on the table, and cut the fabric a bit bigger than the cushion so there was enough to wrap it around to the bottom. The foam cushion itself was actually still go to go. Yay! I grabbed a screwdriver and took out what felt like one million staples from all the cushion backs, added the new fabric, stapled the crap out of it, and voila!
Pretty, pretty seat cushions for our “new” table!
I loved this makeover. It was so fresh and clean from where the table had been two weeks before. No more dinge. I was seriously like we had a brand new table! Kyle couldn’t believe the transition. And this is how our table stayed for 4 years.
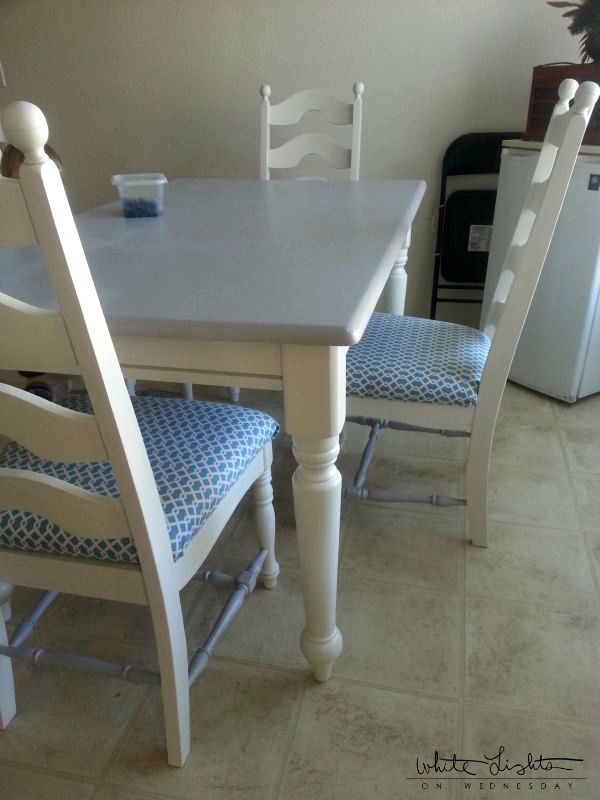
While the makeover was great, two kids and four years later, I hated the white paint that got dirty quickly from sticky, messy hands at the dinner table. The stretchers had scuff marks from shoes, and it was time to either overhaul the table again, or ditch it.
This year we moved to a new rental property. The house that we actually hope to buy next year. *fingers crossed* And as with any rental, there is A LOT of white going on. I wanted more color in our lives (and to hide the messes a bit better), and the table became my source for brightness!
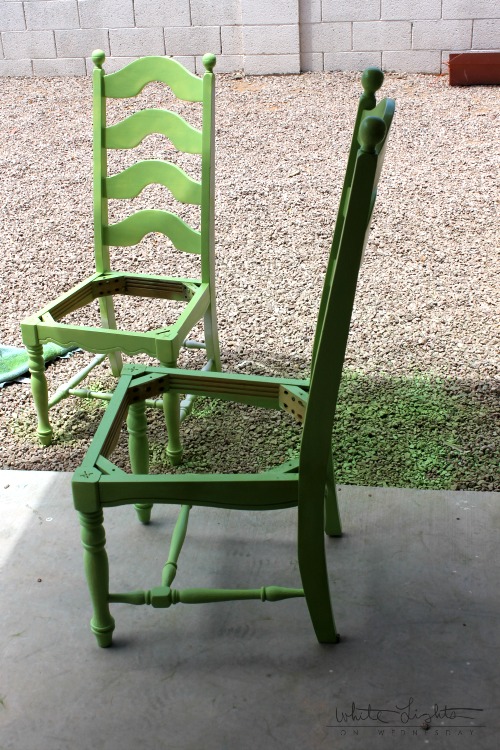
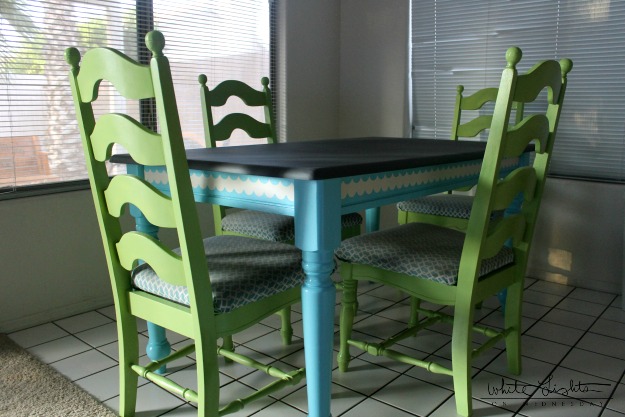
This time, I wasn’t going to sand anything. F that noise! I asked my dad and step-mom (who’ve painted and re-painted and tiled their entire house = DIY for life), and they recommended spray paint. Done!! Of course that would be a million times easier. I decided to do the chairs all one color, the table base one color, and the table top another. I was keeping the cushion fabric because it just needed a good scrub.
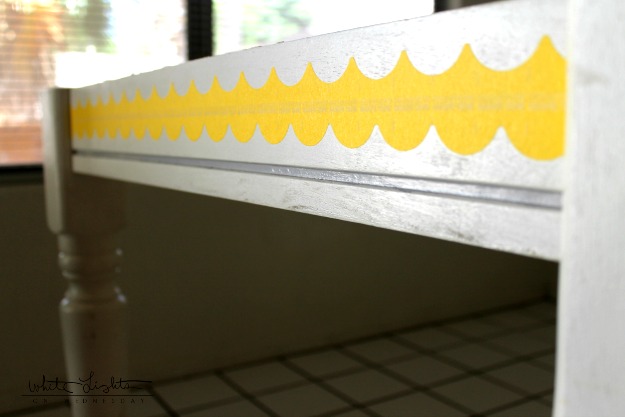
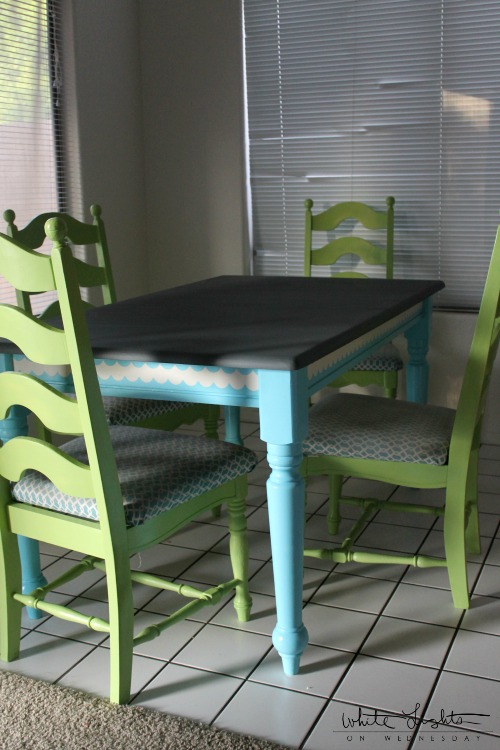
Mike helped me pick out the colors. We went with a blue that complimented the cushions, and a bright green to set things off. I freaking love those green chairs. They make me SO SO happy. The table top, I liked grey. But I got a nice dark grey this time that didn’t freak me out with the slightest mess. I gave the table a little lovin’ with an accent border. I used Frog Tape Shape Tape, and it was so easy. You can see the full tutorial HERE.
Once the paint was dry, we put everything back together. We now have a gorgeously fun “new” table! It makes me happy everytime I go into the the kitchen. It’s kid friendly (see: forgiving of messes) and brings in lots of much needed color. Eventually I’m going to get new fabric to cover the cushions, but for now…this is our family congregation center.
What was your first big DIY project?