With the end of the school in site and teach appreciation day right around the corner it’s time to get on the ball and find something awesome to think you child’s teacher for the school year and how much they’ve helped the kiddos grow! I’m loving this fun and funky Washi Tape Monogram Letter! You only need 3 items to make it and it’s great for adding a pop of color to any classroom!
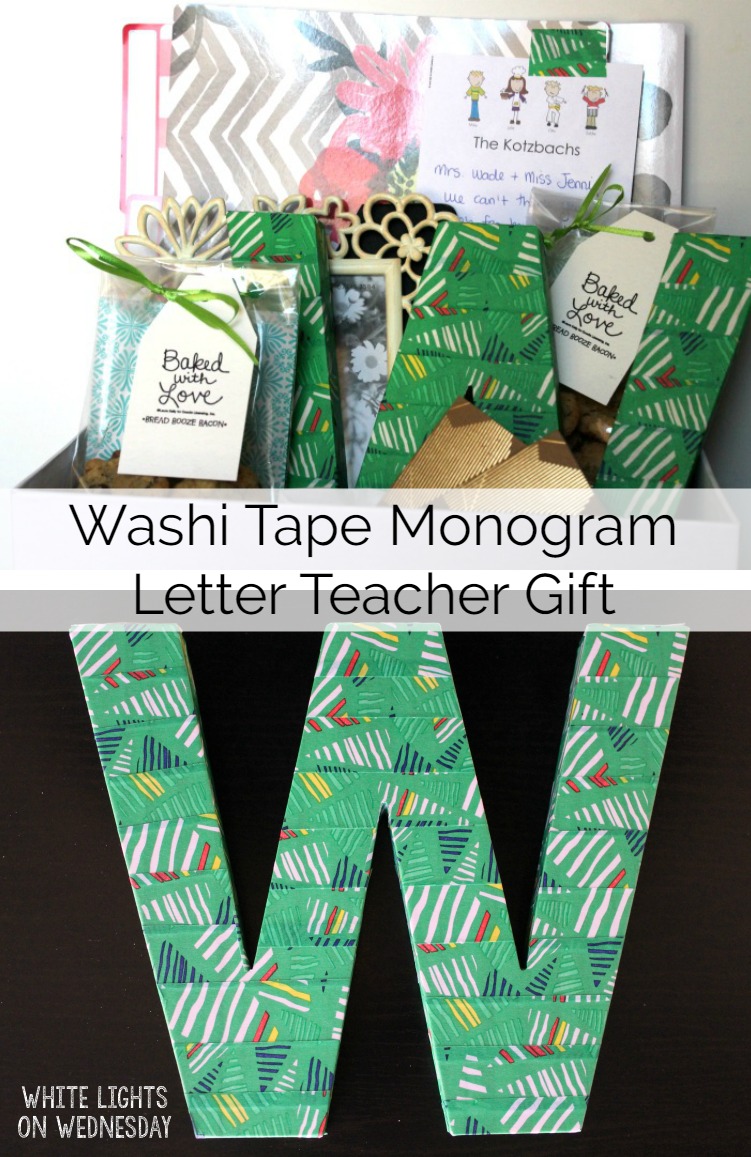
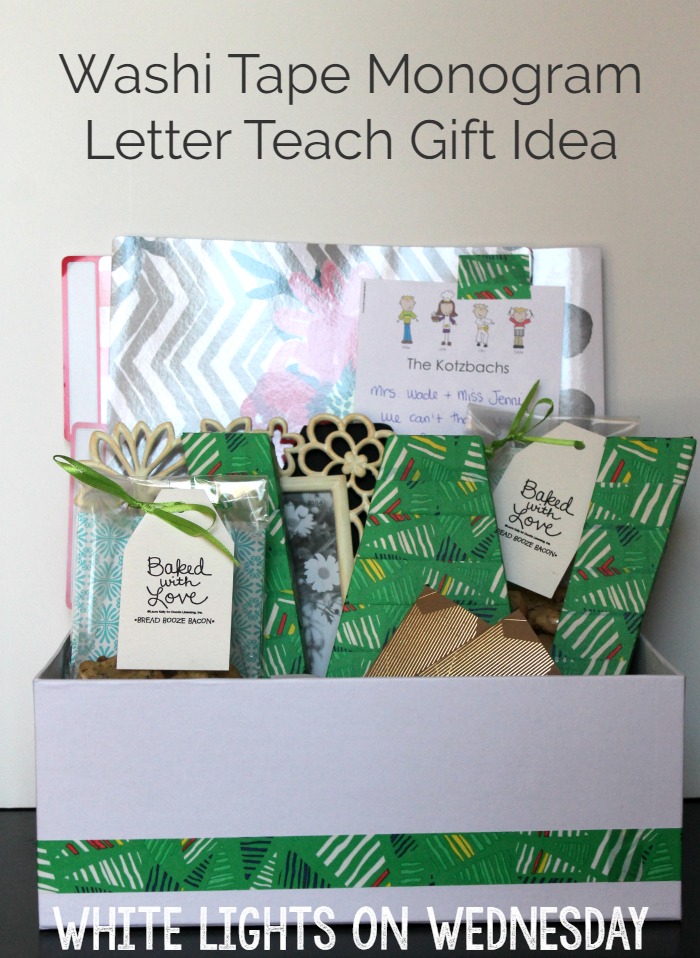
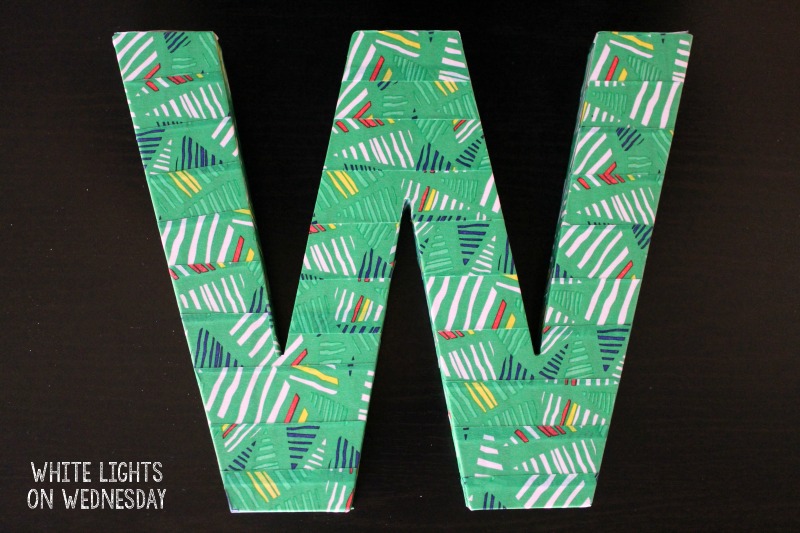
I can’t believe it’s May! I fee like just yesterday we were taking Otto to his first day of kindergarten and in just 4 1/2 short months he’ll be a first grader. EEEEP! Since this is my first rodeo with teacher gifts and the like, I didn’t want to get in over my head. I wanted to make something simple that (hopefully) they’d love, and that Otto could have some input on. We went to the store where I spotted this wooden W, perfect for Mrs. W, and a cute picture from for Ms. Jenni. Otto got pick out the washi tape. I love that he picked something bright and colorful!
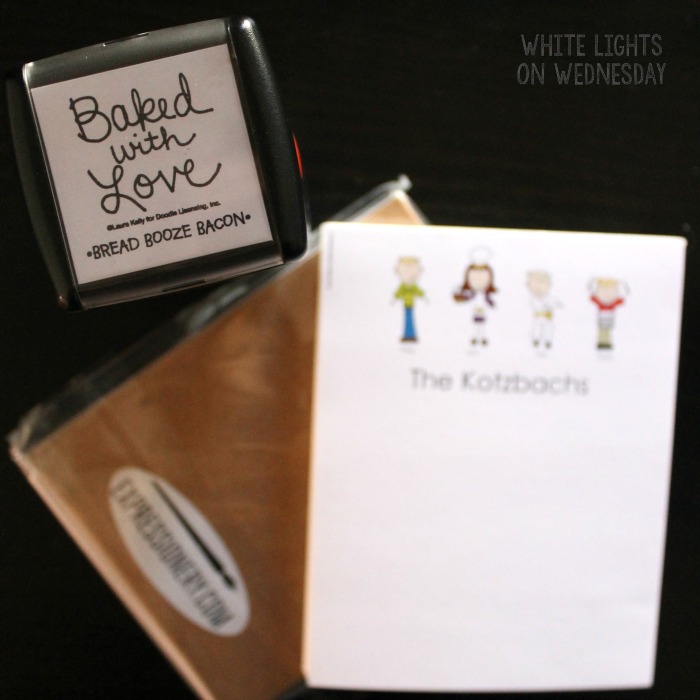
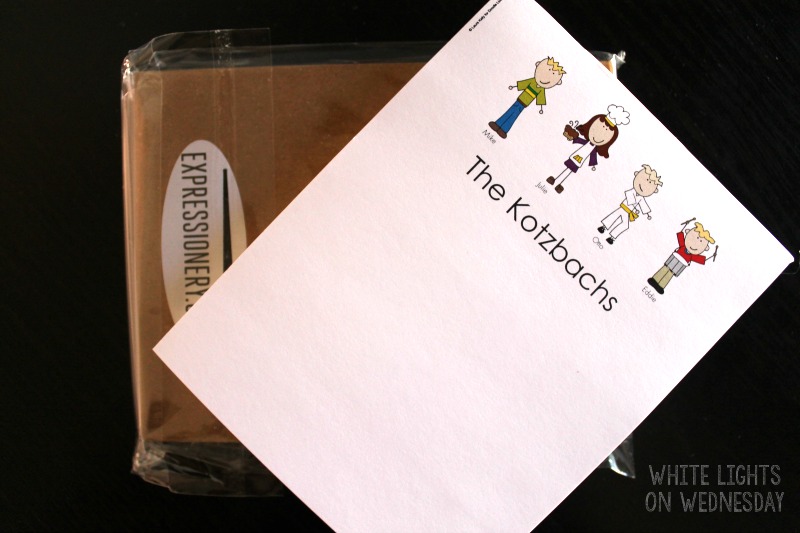
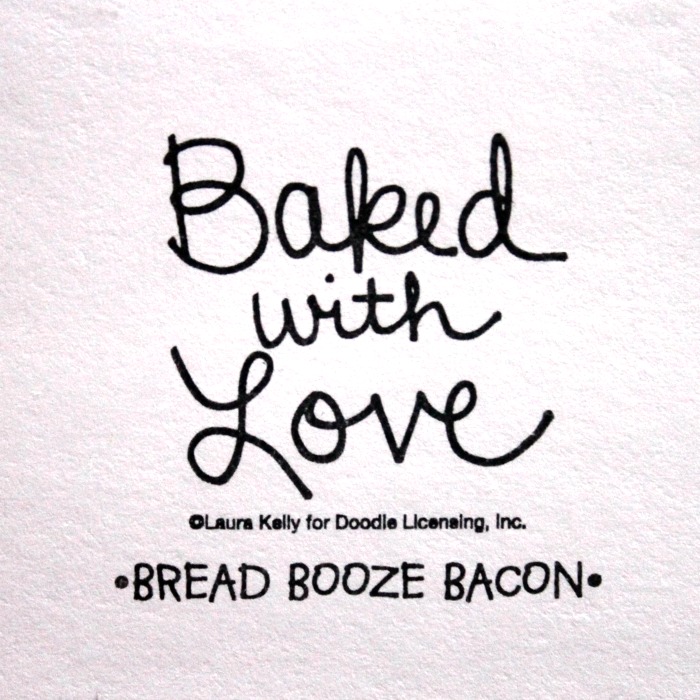
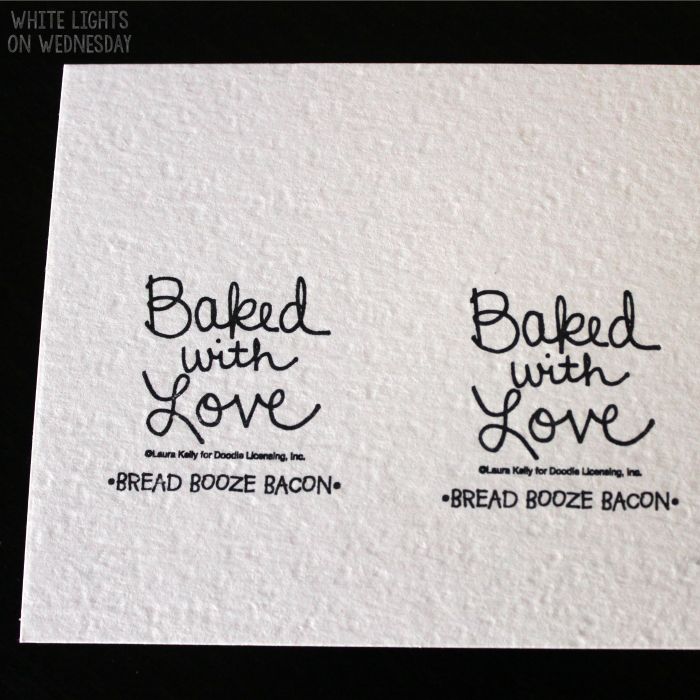
I added a few more items to the gift box, and a few personal touches with some great Laura Kelly products from Expressionery. I used my custom “Baked with Love” stamp (because who doesn’t want something homemade?) to make gift tags for the cookies, and used the SUPER cute My Peeps notepad to write our thank you note. It was so much fun getting to customize our family on the notepad. My boys adore that they’re on paper. I love that I can write notes, and if I don’t leave room to sign it our name is already on the page! I run into that problem more often than not.
The stamp come out perfect every time! I’ve had lots of different custom stampers before, but this is definitely one of, if not, the best ones I’ve owned.
If you want to get your hands on your over Laura Kelly Expressionery items, you’re in luck! Go to www.expressionery.com/TEACHERAPP and shop to your hearts content, and use promo code TEACHERAPP at check out for 30% off sitewide now through May 25th!! Awesome, right?! Even better, there’s a giveaway from Laura Kelly at the end of this post!
Ready to get crafty? Here we go! To make this project you’ll need…
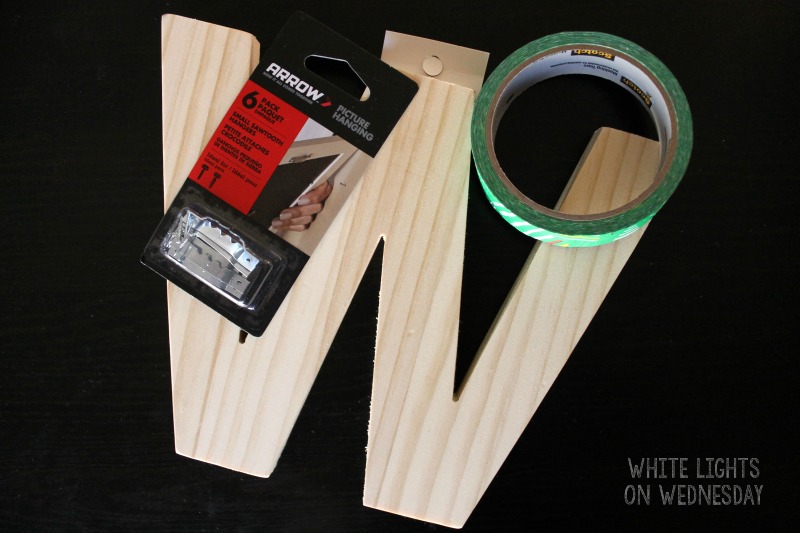
An unfinished wood letter (I used our son’s teacher’s last initial since all the kids call her Mrs. W)
Fun washi tape (get a good name brand one so it sticks well. it’s work the extra money)
2 wall hanging brackets with nails
A Sharpie
Scissors
Ruler
Hammer
Method:
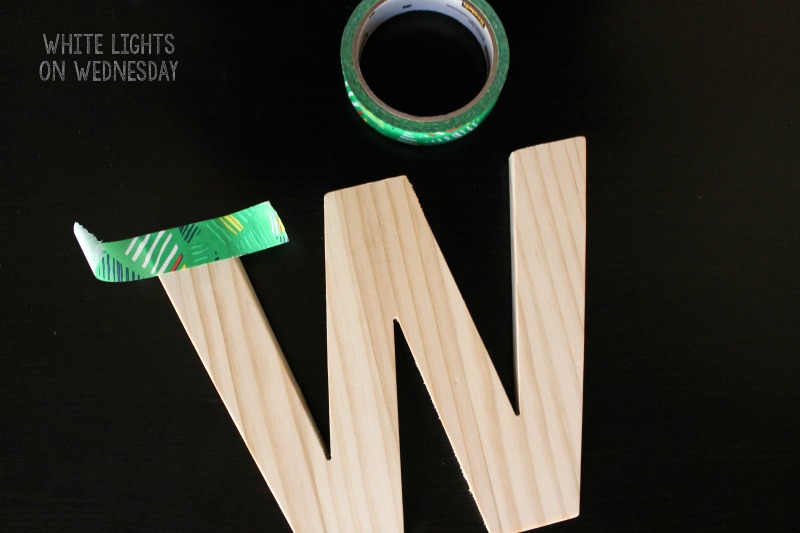
Cut the washi tape into a small strip and place it over the wood letter on the “front side.” Make sure the tap is long enough to go over the sides of the letter. Press the tape securely onto the letter, wrapping the edges around the sides and back of the letter. Don’t worry if the tape doesn’t go all the way around. We’re focusing on the front of the letter and making everything pretty. We’ll deal with the back side in a minute. Continue cutting pieces of tape, sticking, and wrapping them around the letter.
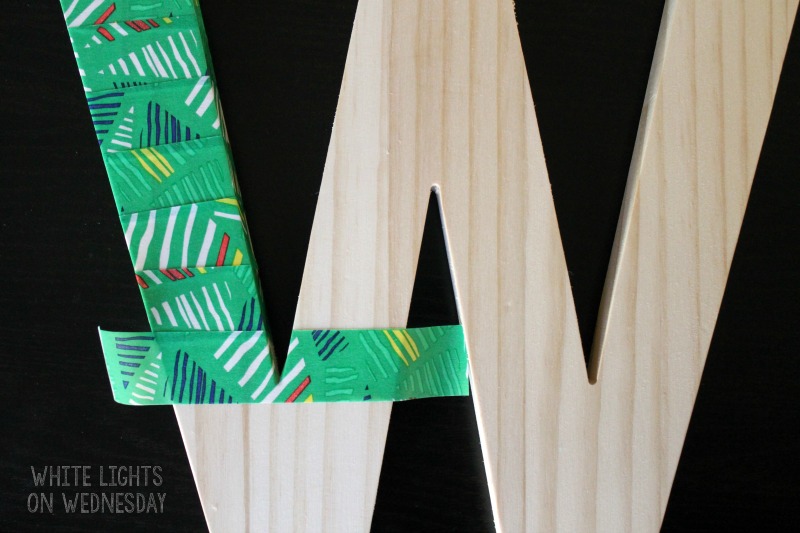
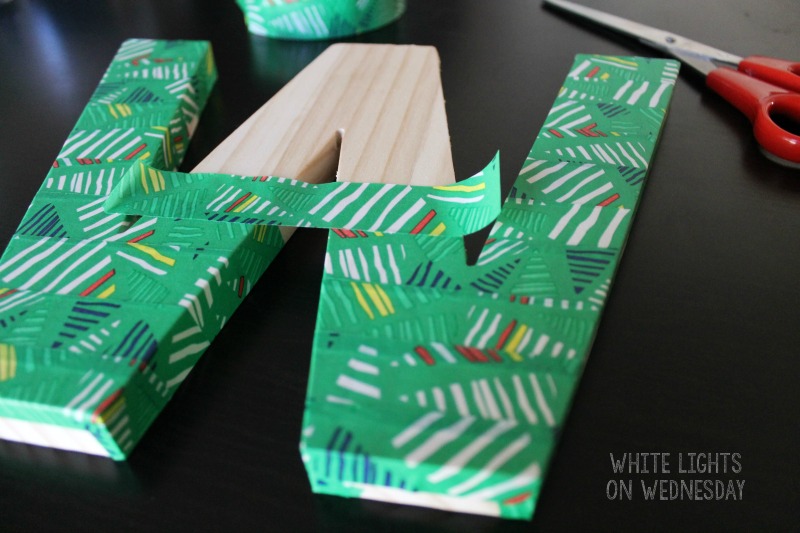
If you get to a break in the letter or a tricky curved spot, lay your tape over the area and use your scissors as need to trim or cut small slits in the tape so it lays flat. I used this method when coming to the point on the W (below) so the tape was lined up on both sides of the “ravine.” Continue taping to the bottom edge of the letter.
After I got the bottom on one side, I started working from the top of the other side down, and saved the middle for last. Your plan of attack will differ based on your letter, but take your time and no you can always peel and restick the tape if it didn’t behave. 🙂
Work your way around any remaining areas of the letter still showing wood on the front, cutting as needed to make the tape fit correctly. If the tape hangs over the top or bottom edge at any point, wrap the tape around the edges and cut a little slit at the corners. Fold the sides in and then the longer, front edge piece for a smooth finish.
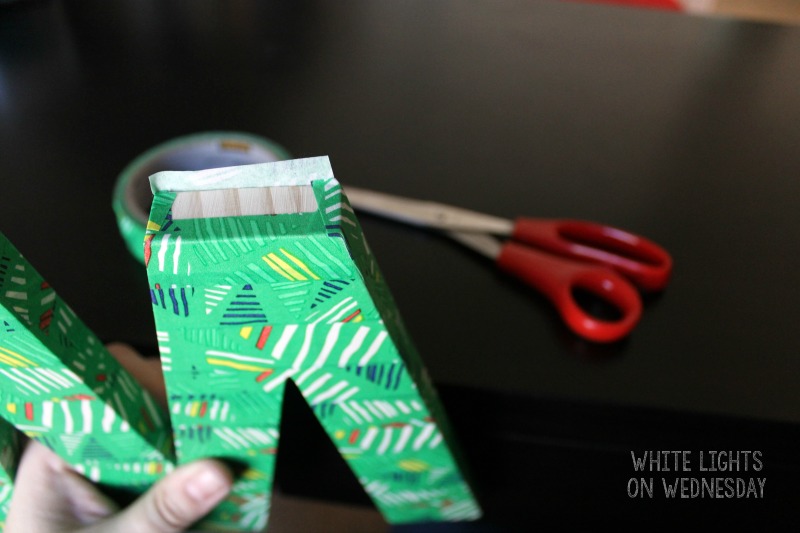
Flip you letter over and just small pieces of tape to fill in the exposed wood areas. If you’re into a 360 finish, lay down strips just like you did for the front all over the back side. Just make sure you don’t let the tape wrap around the front edge of the letter, only over the sides.
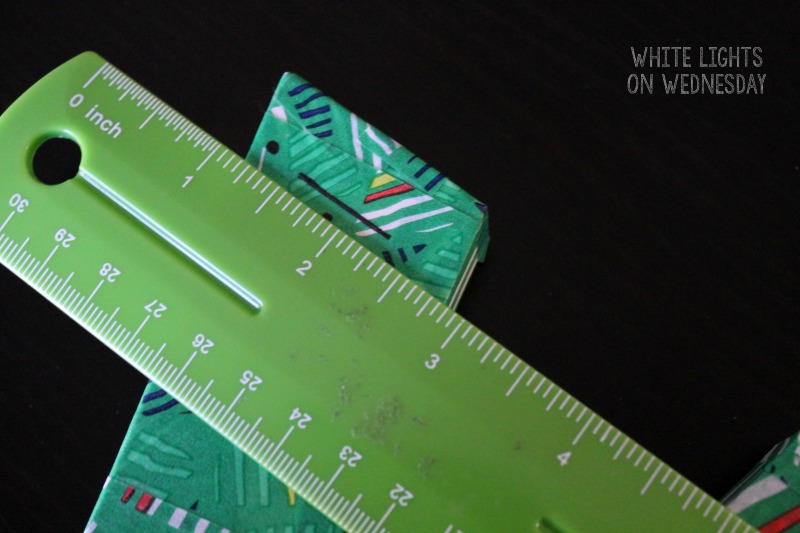
Once your letter is wrapped, use a ruler to measure down 1/2-inch from the top of the letter and place a dot. If you have a wide letter, like this W, you’ll need a picture hanger on each of the outer legs so it doesn’t wobble. If you have a thin letter like an I or O where there is a focused center point, you can use just one picture hanging bracket.
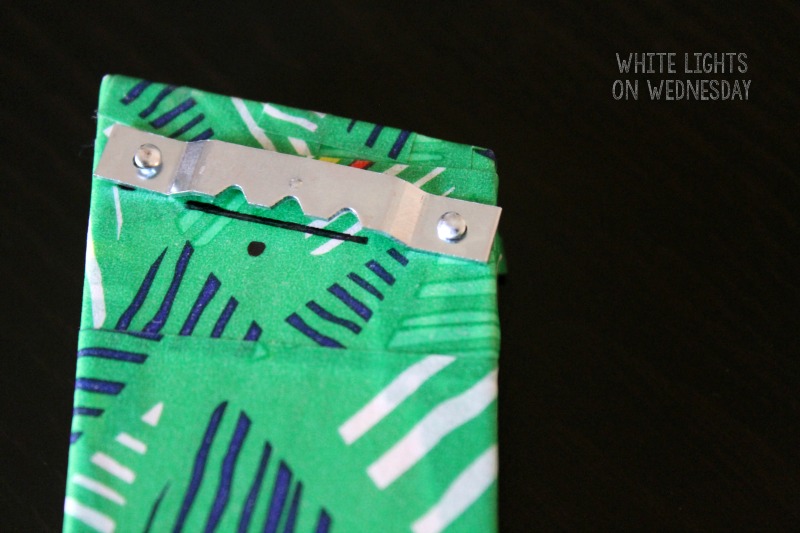
Line up your brackets using the ruler, and secure them to the letter with nails.
That’s it! Your done! The hardest part of this whole project might just be choosing your tape.
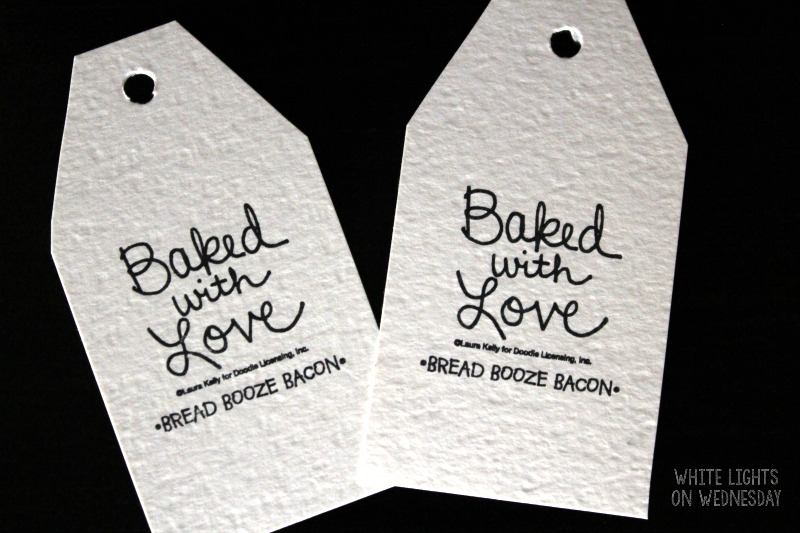
I included some cookies in our gift box, because…well I love to bake and who doesn’t love cookies!? I grabbed some pretty embossed card stock, and stamped it twice (once for each teacher).
I cut the card stock into rectangles, cut off the top corners on each tag, and added a hole for the ribbon. Super easy to make, and totally cute with my custom Laura Kelly stamp. Love it!
To finish things off I included a couple sets of cute file folders I found at the dollar spot in Target, Oatmeal Chocolate Chip Cookies, our Washi Tape Monogram Letter, and a couple Starbucks gift cards. Because what teacher doesn’t need a little more coffee in their life. I used a $2 photo box and some tissue paper to bring everything together, and wrapped a strip of the washi tape aroudn the bottom of the box to tie it all in. Super easy to make, totally cute, and stuff they’ll actually use. I think I’ve got this school aged kid mom thing down!
Get more teacher gift ideas below!