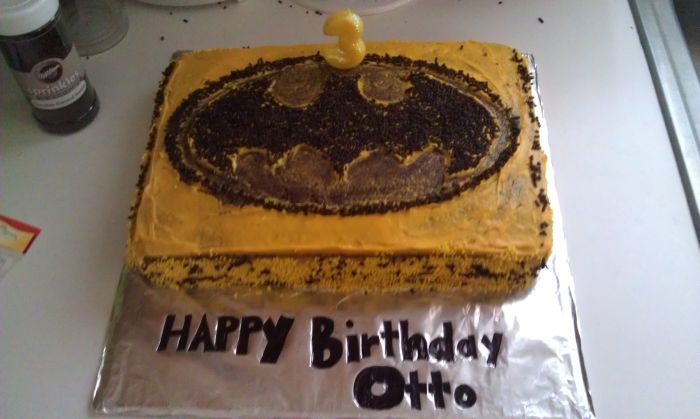
I’ve been wanting to make this cake recipe forever. Mike is the biggest Dr. Pepper fiend I know. It’s bad. Really bad. He almost took his best friend (a Dr. Pepper enthusiast as well) to the Dr. Pepper facorty in Texas for said friend’s Bachelor Party. I’m serious. As a surprise for Otto’s birthday, I finally made a Dr. Pepper cake. My original inspiration came from the Chocolate Cherry Dr. Pepper Cupcakes over at Key Ingredient. I didn’t have Maraschino cherries, I’m not a huge fan of them to being with, or grenadine, so I left out the cherry part. Since this cake was for Otto’s and he’s pretty much obsessed with Batman, I had to go there. I had a major mishap morning of the party when I tried to decorate the cake. Thank goodness for Mike and his brilliant suggestion. Everything cake out just fine and I won’t be making that mistake again. {Don’t worry I’ll begrudgingly tell you what happened.}
Yellow food coloring {I used Wilton buttercup yellow}
Chocolate Jimmies
Yellow Nonpareils
Batman logo stencil
Method
Prevent your screen from going dark
Preheat oven to 325 degrees F.
Prepare two 9″ x 13″ baking pans by spreading with Miracle Pan Release or coat with non-stick cooking spray
In a medium saucepan, bring Dr. Pepper to a gentle boil. Place chocolate and butter into a bowl and pour hot Dr. Pepper over top. Cover and let sit for 10 minutes.
Whisk chocolate mixture until smooth. {Mine wasn’t smooth, but it wasn’t super clumpy}
Stir in sugar, salt, cinnamon, baking soda, baking powder, vanilla, and sour cream.
Add flour in 2 additions, alternating with eggs and whisk til smooth. The mixture will be runny.
Divide batter evenly between prepared baking pans. Bake for 25 to 28 minutes, or until a toothpick inserted in the center comes out clean. Remove from over and cool completely in pan.
Tried this recipe?
If you made this recipe, leave a comment and star rating to let others know how it turned out.
Now to decorate!
Turn out cake onto a cutting board. Invert cake onto another cutting board or wire cooling rack so the cake’s top is up. Using a serrated knife (or cake saw), level cake top.
Repeat for both cake layers.
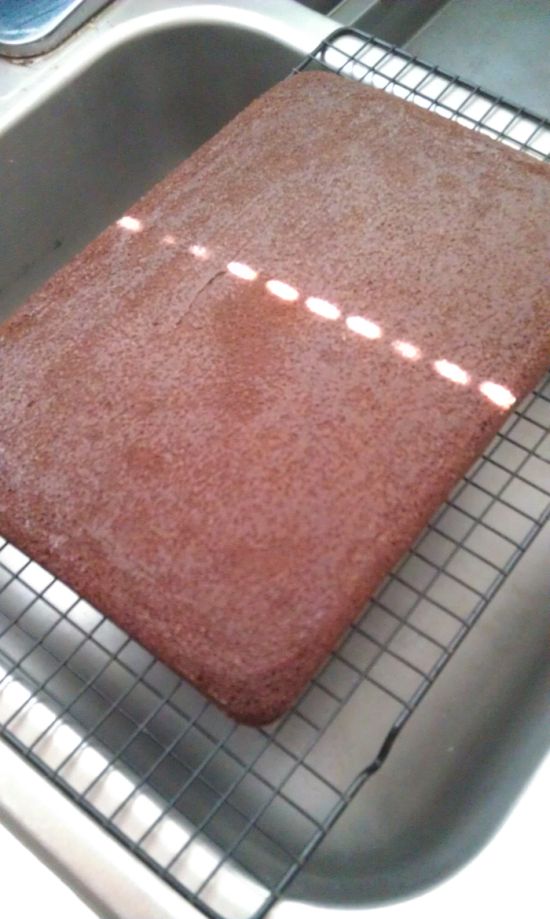
I have never had a cake come out of a pan as easily as these cakes did. I will forever use Miracle Pan Release. I’m notorious for the bottom center of my cakes sticking the pan and becoming a big disappointing mess.
See that picture up there?
THAT’S THE BOTTOM OF THE CAKE!!!
YES!!
Wrap a thick piece cardboard cut to fit your cake with foil and place first cake layer onto the cake board, cut side up.
In a medium bowl, mix frosting and yellow food coloring until desired color is reached. Spread a layer of frosting on top of the first cake layer.
Invert second cake layer onto first layer so the cut side is down and sandwiches the frosting. Spread frosting over top and sides of cake.
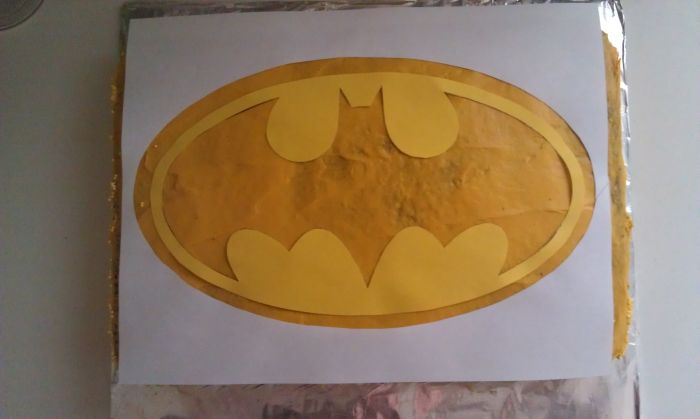
Place Batman stencil on top of cake.
Here’s where things went wrong. I pressed the paper onto the cake and then applied the chocolate Jimmies. I thought this way I could press the Jimmies into the frosting without them getting on the wrong parts of the cake. Ehhnnt! {think game show wrong answer buzzer sound} Once I carefully peeled the paper off, the frosting came with. ARE YOU KIDDING ME? I should have known better.
Thanks to Mike’s quit wit amid my panic attack, I scraped the frosting completely off the affected areas (anywhere the yellow paper is) and re-frosted the out lying areas.
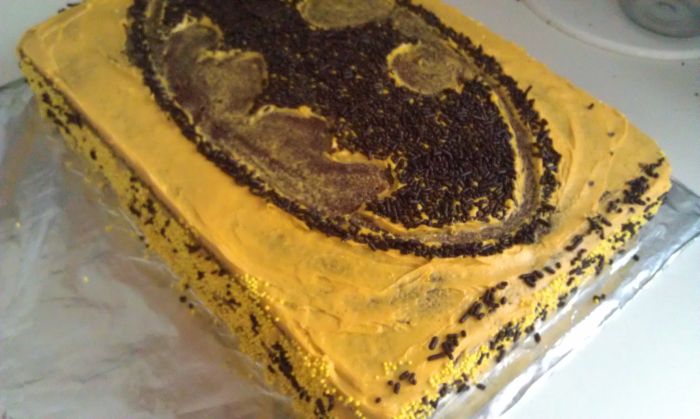
To NOT do this: lightly place your stencil on the cake’s top. Using a toothpick, outline the stencil into the frosting. Carefully edge to stencil with chocolate Jimmies and then fill the main part of the logo.
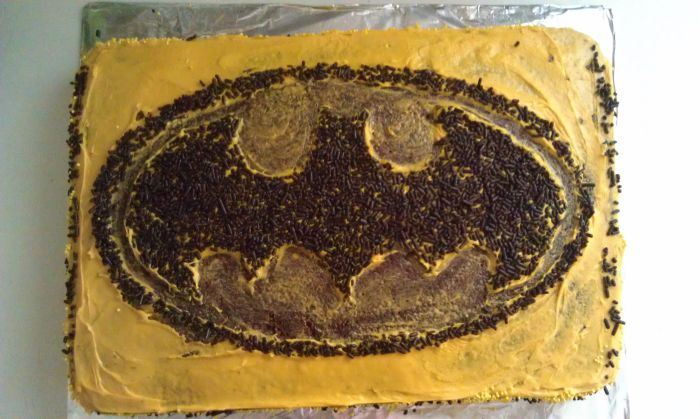
Edge the cake with more chocolate Jimmies and and yellow nonpareils and you’re done!
Write a note to your special guy on the cake board and get to eating.
I’m Julie, the creator of White Lights on Wednesday, where I share simple, reliable comfort food and retro recipes. From easy desserts to party-ready appetizers, these are recipes you’ll come back to again and again.
It sounds fabulous and looks awesome! My daughter loves Batman, thanks for the instructions on how 'not' to do a stencil. Found you at Your Gonna Love IT


The cake looks great. I think my Batman obsessed husband would appreciate this more than my boys.
Julie.. with all the panic you encountered this cake looks FAB! Super cute… Otto I am sure Loved it so so much! Way to go mom!!
Very impressive!! That is the coolest cake!!! I bet you had a very happy 3 year old!
I'm so glad I'm following you! Finally a cake that looks awesome that I might actually be able to try myself. Thanks so much for posting:)
Katie
http://www.funhomethings.com
It sounds fabulous and looks awesome! My daughter loves Batman, thanks for the instructions on how 'not' to do a stencil. Found you at Your Gonna Love IT
Cool cake. And way cool pan release trick. Thanks for linking.
BTW, I totally got what “Ehhnnt!” was! Tee hee!
Wow this cake looks awesome 🙂 I love batman XD
Amy x
http://dontfeedthebirdsplease.blogspot.co.uk/
Oh my gosh yum! My husband is a HUGE Dr. Pepper fan too so maybe I'll try this for his birthday 🙂
Thanks for sharing at The Fun In Functional!
What a great idea for a cake. Love the batman stencil! Thanks for sharing on Foodie Friends Friday. Please come back on Sunday to VOTE!
Looks like a great recipe. Thanks for sharing on Foodie Friends Friday and hope to see you this week.
http://marlys-thisandthat.blogspot.com
I am a huge Dr. Pepper fan…can't wait to try this cake out!!! Thanks for sharing on Trick or Treat Tuesday!!
Just wanted to let you know I featured this on my blog today! You can check out the feature here: http://practicallyfunctional.net/2012/09/the-fun-in-functional-link-party-15/
You did good!