This is a sponsored post written by me on behalf of The Home Depot.
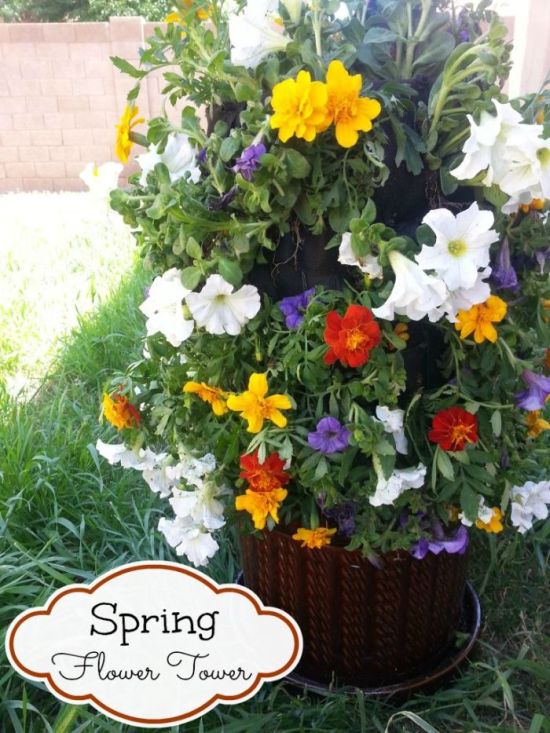
Hi everyone. I have a little surprise for you today. Remember me talking about getting my house all jazzed up for spring last week? Well I’m taking it a step farther today and making the Spring Flower Tower from the Home Depot Garden Club Website!

I’m not a gardener and only a budding DIYer, but after watching the How-To video for this project I had a really big “I can do that” moment. I couldn’t wait to get started! I’ve always wanted to have a little garden at my house, but since we’ve been renting for 3 years now, I never got a garden going. I wouldn’t be able to take it with me when we finally buy our own place. Boo. Having a portable garden Spring Flower Tower is the perfect solution for me. Yay!
I was a little paranoid I’d messing something up in the process of making this tower. So I went back and watched the How-To video a second time, and even printed out the step-by-step directions from the Garden Club website. With directions in hand, including a full shopping list of supplies, Mike and I packed up the boys and headed to The Home Depot to shop.

{Otto wasn’t happy he didn’t get ice cream from the machine when we walked in.}
We found everything on the shopping list:

YARDGARD 4 ft. x 50 ft. 14-Gauge Welded Wire
Tenax 7 in. Black Fence Ties – 50 Pack
Scotts 4 ft. x 220 ft. Landscape Fabric
Plants (as needed)
When we got home from The Home Depot with my haul, I set out to start my tower. I re-read the step-by-step instructions. The project seemed almost too easy, so of course I second guessed my confidence. It’s okay though, this project really is easy.
Let’s make a Spring Flower Tower!
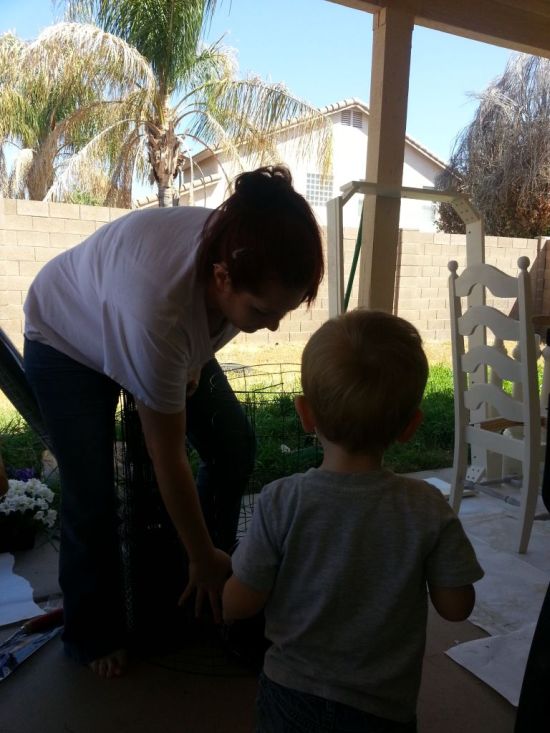
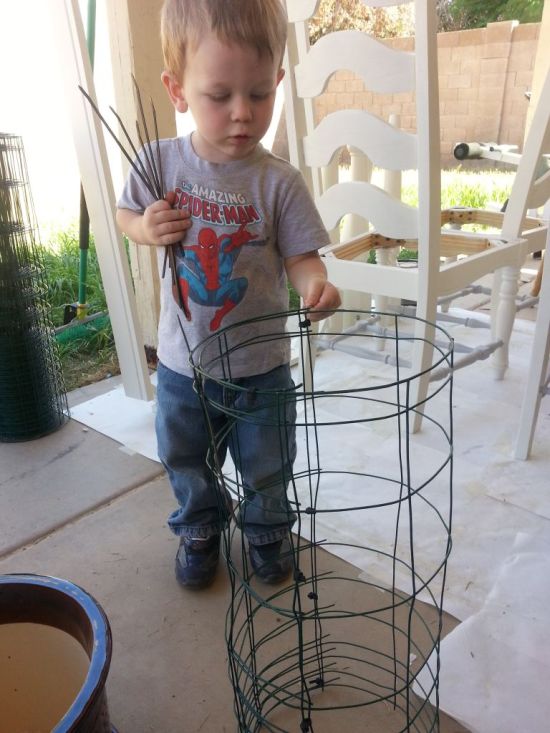
Grab your favorite little helper.
Make sure you have your utility gloves to keep safe.

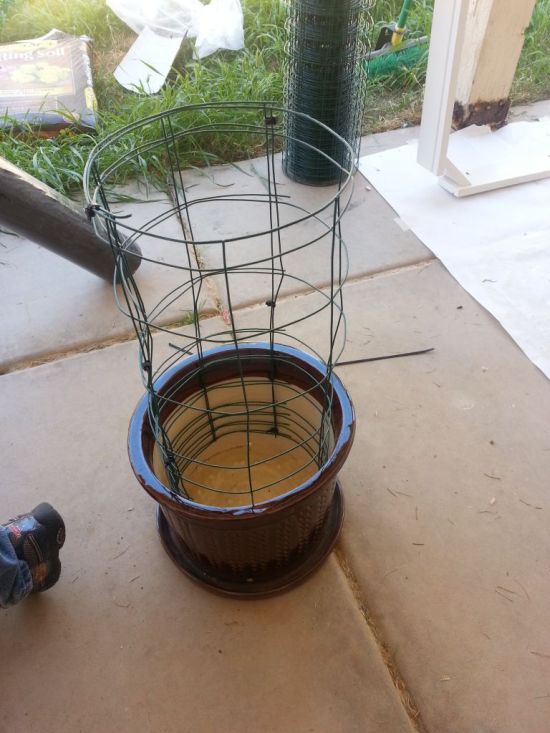
Wrap your YardGuard wire around the outside of your flower pot.
Be sure to let the wire overlap one squares worth of length so you can secure everything.
Place the wire frame circle you just formed inside the flower pot. You may need to squish the circle a little smaller to make it fit.
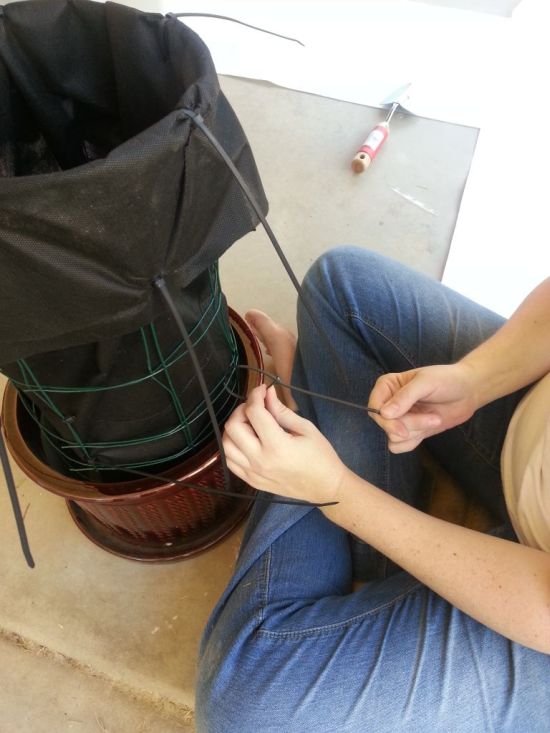
Secure the very top of your circle with a zip tie. You want to place the zip ties along the ends of your circle where the wire framework overlaps along the top of the circle and down the vertical sides.
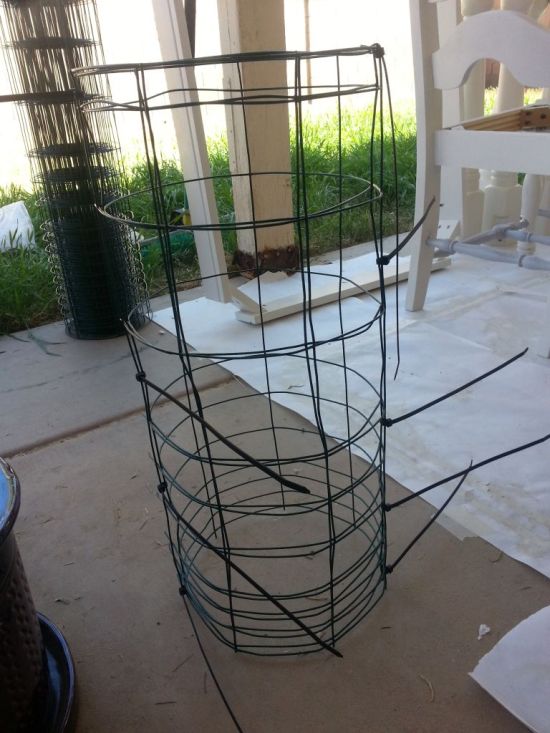
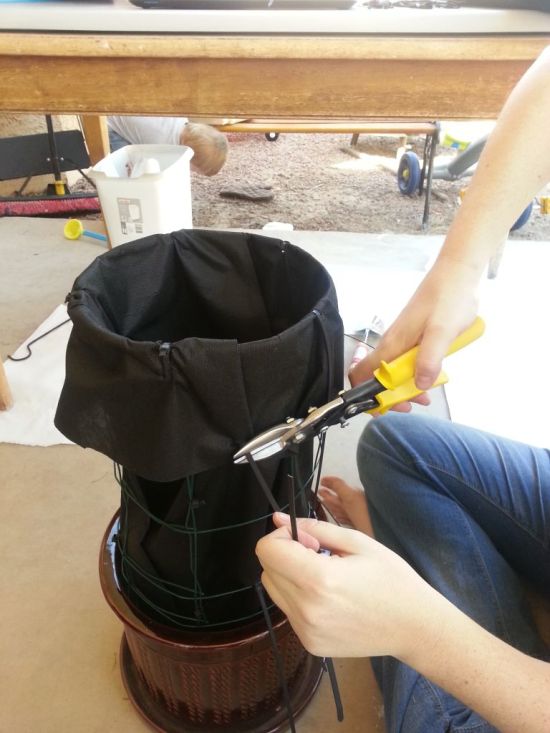
Cut the extra length off the zip ties with your tinner’s snips.
Place the secured column framework back into your flower pot.
Unroll a length of the landscaping fabric, form it into a column (slightly smaller than the wire column), and place it inside the wire column down to the bottom of the flower pot. You’ll have extra fabric sticking out over the top of the wire.
Fold the excess fabric over the top of the wire column.
—–
Using your utility knife, cut slits in the landscaping fabric close to the wire framework so you can secure the fabric to the wire with zip ties. Place zip ties all around the tower.
Cut off the excess length from the zip ties.
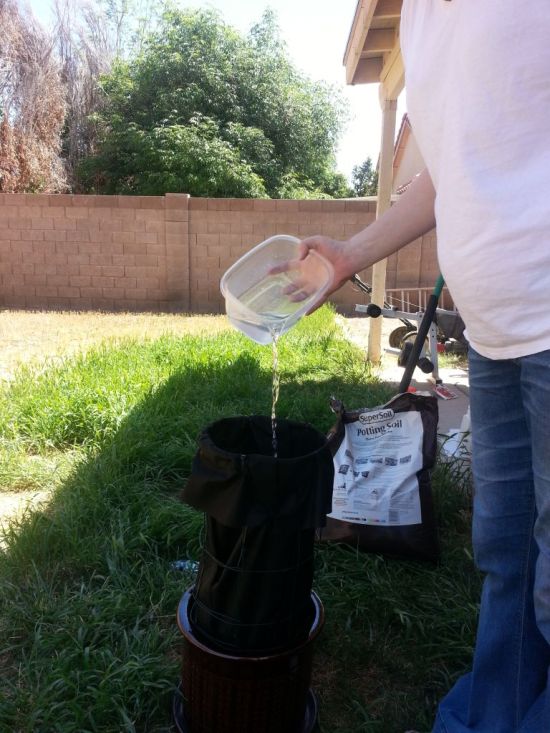
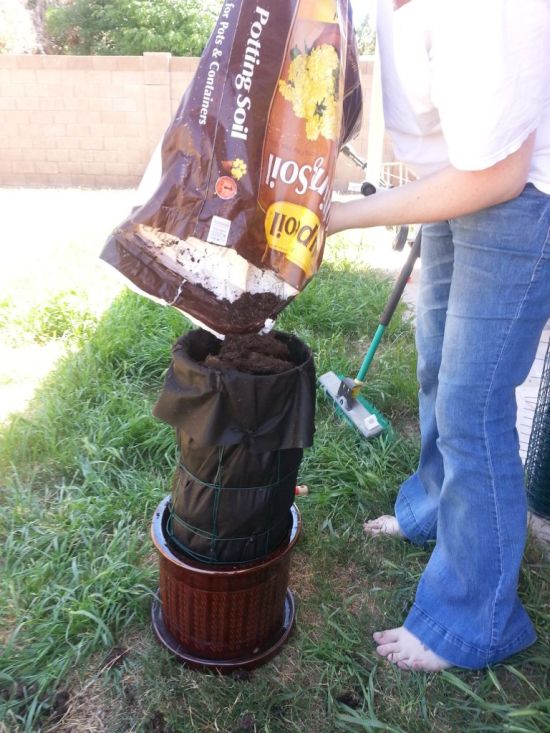
Fill you tower with potting soil. At 1/3 full intervals, stop to water the potting soil a bit to help fill the tower and get a good base going for your flowers. Press down on the soil a bit once the tower is full to prevent the soil from sinking down later.
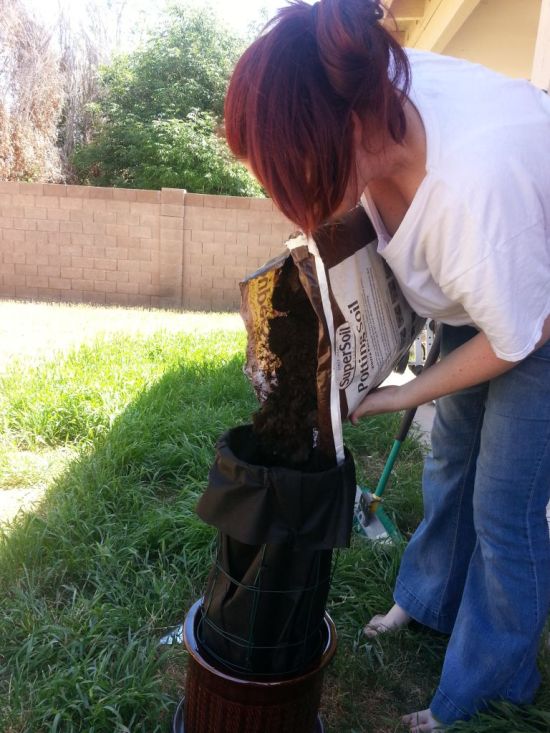

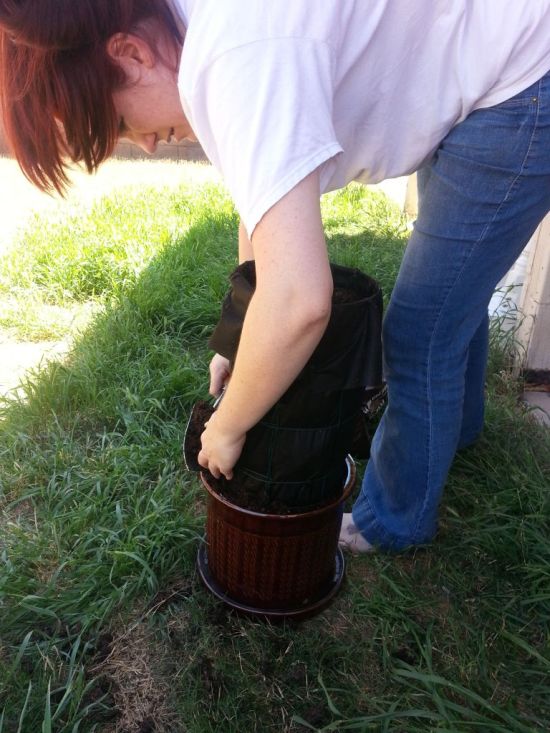
Go around the outside of the tower and fill the flower pot with anything remaining soil.
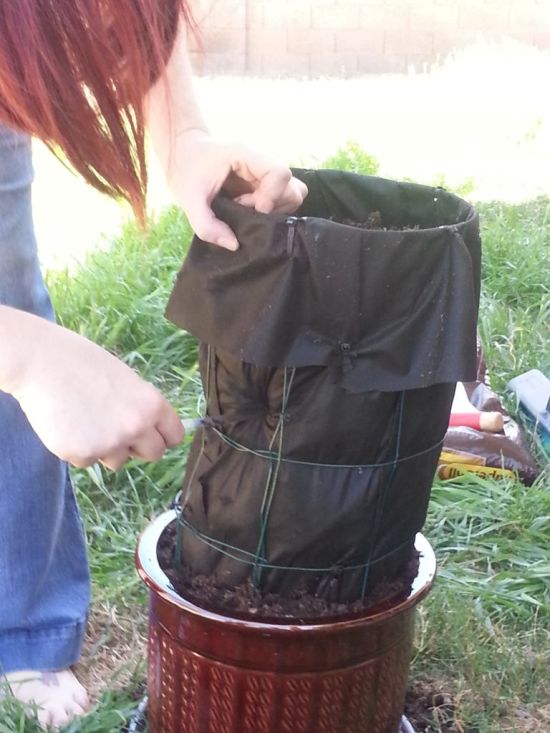
Using you utility knife, cut slashes in the landscaping fabric. I say slashes because you’ll need more then just a little cut to make your flowers fit. You can always widen the cuts as needed later if you are worried about cutting the holes too big at first.
{This is where I should have double checked the video again. They used crosses for their cuts and used the squares for placement guides.}
Use your fingers to loosen the soil behind your cuts in the fabric to make room for the flowers. Remove flowers from their pots and press the base through the cuts in the fabric and into the moist soil.

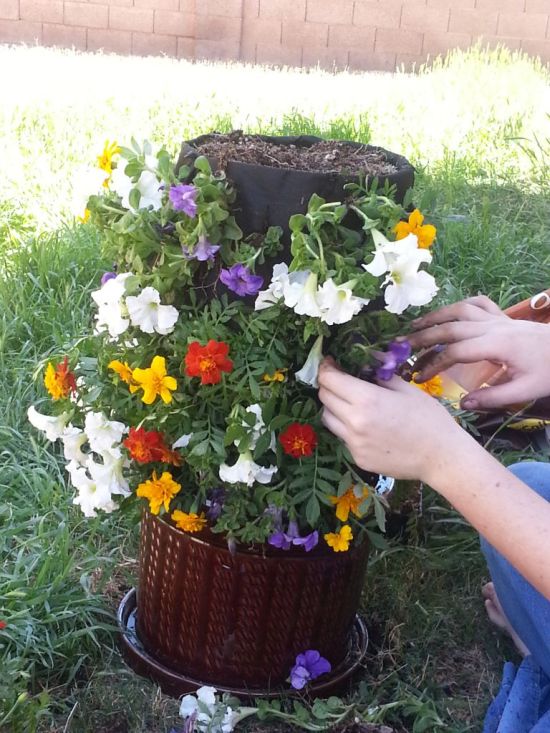


It’s not a lot, but it’s definitely a great place to start making our house feel more like a home and ready for the warmer weather. I can’t wait to make another tower! I’m in symmetry like that. I think these flowers look really cool all tall with the vertical gardening technique, and not just short and ordinary on top of a flower pot. My favorite part of this project has to be seeing the end result once I was one, but having my little man helping me made it so much more fun.
We had a great time!
It’s home improvement time, and The Home Depot has everything you need to #DigIn for Spring. No matter what projects you want to tackle, they have great values on all you need. They’re ready to help you with renovation ideas and expert advice, too.
Get over $300 in email exclusive savings each year, sneak peeks on new products, monthly lawn & garden ideas for your region and access to The Home Depot’s gardening experts. Click here (http://thd.co/ZNbhDj) to join the world’s largest garden community today! Or go to homedepot.com/gardenclub to see some of the many benefits of membership.
Find other great DIY projects from The Home Depot at these places:
The Home Depot Garden Club website
Garden Club board on Pinterest
Garden Club Community Forum (Ask an Expert)