Hi everyone, it’s Jenn from Endlessly Inspired again! I’m excited to be back with a fun DIY project after our little holiday break!
Have you ever etched glass?
Glass etching is one of those things that sounds super scary and complicated, but it’s totally not at all. I was obsessed with glass etching when I first discovered how to do it about 12 years ago, and my entire family got etched glass items for Christmas. {Sorry, everyone, I’m sure you would have probably preferred something else, but I was on a roll and just out of college and living by myself in Washington, DC, not making enough to cover basic expenses like car payment, rent and food every month. Ahhh… the good old days…}
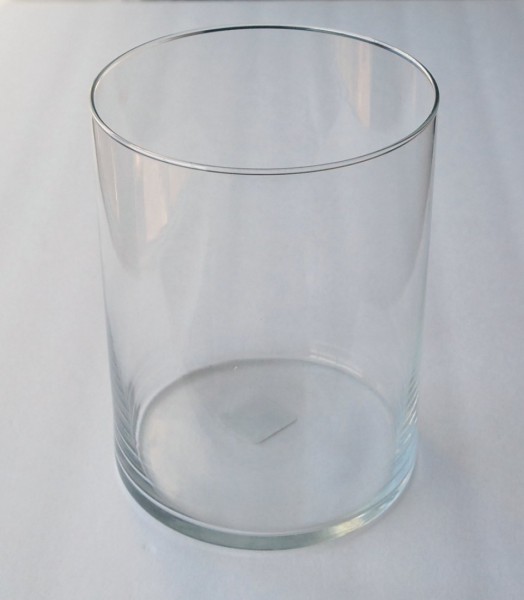
Anyway, etching glass is really not difficult, and the supplies can be bought at pretty much any craft store. And thrift stores are chock-full of glass items just begging for you to get all etchy up on them.
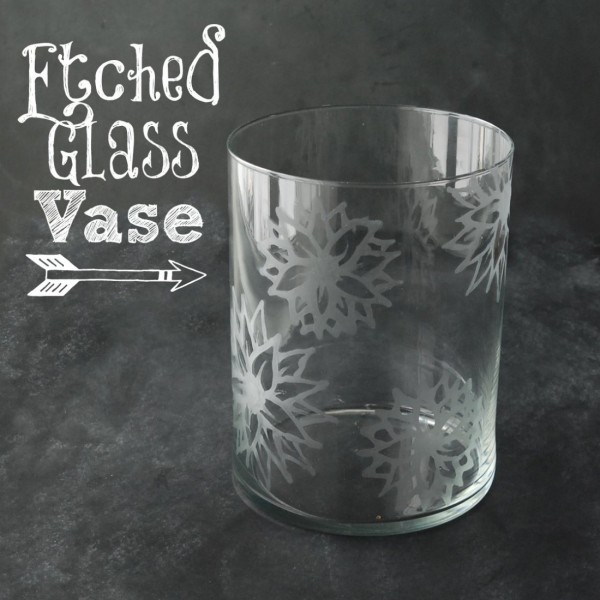
Today, I’m going to show you how to etch a flower onto a glass vase.
All you need is a glass item to etch, a plastic squeeze bottle {I got mine at Walmart in the cake/candy decorating section}, some toothpicks and some etching cream. I use Armour Etch Cream, which you can get at Michael’s, Hobby Lobby, or any other large craft store. {Although it appears to be much cheaper online, as the 22-oz. bottle at Michael’s was about $30, whereas it’s $19.14 on Amazon.} You should also have rubber gloves for when you rinse the cream off.
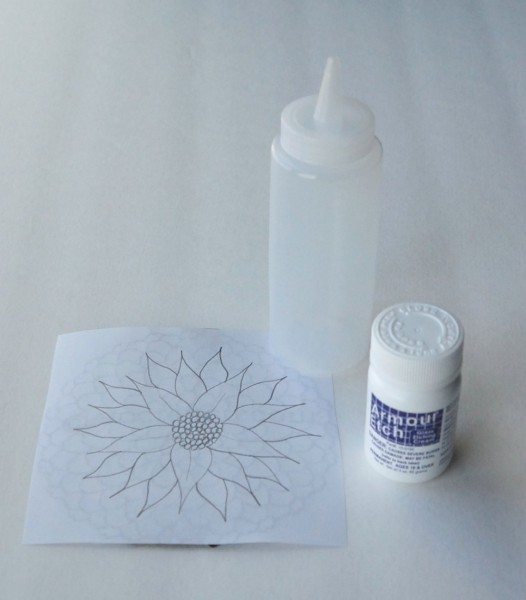
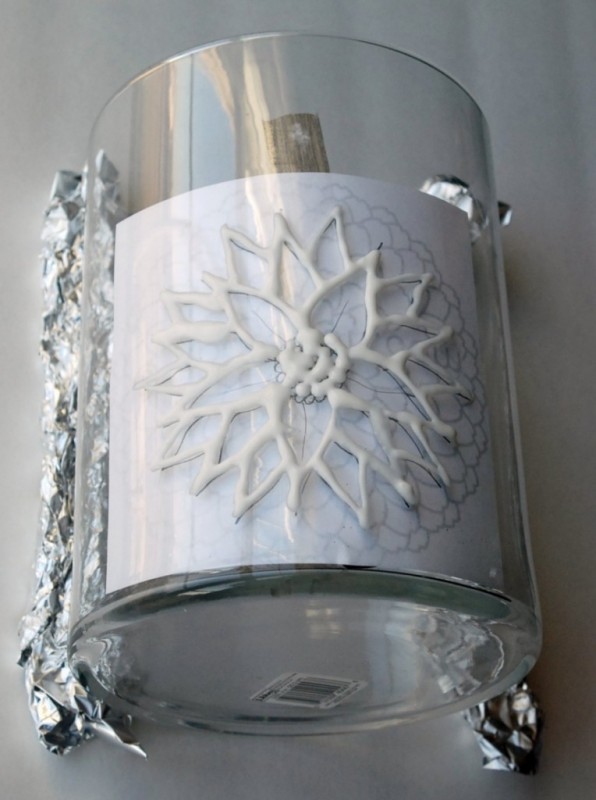
Decide what your design is going to be. I sketched out a flower on a piece of scrap paper for my vase, but if you have slightly better artistic ability than I do, you can freehand it. Or you can do a search for clip art line drawings {if you look closely, you can see that’s what I did first, and then realized that the picture I chose was too complicated, so I sketched out my flower on the back}. Either way, you want a design that doesn’t have too much detail.
Pour your etching cream into your squeeze bottle. Make sure you shake it up really well, because it can sometimes get kinda clumpy, and those little clumps can clog up your bottle.
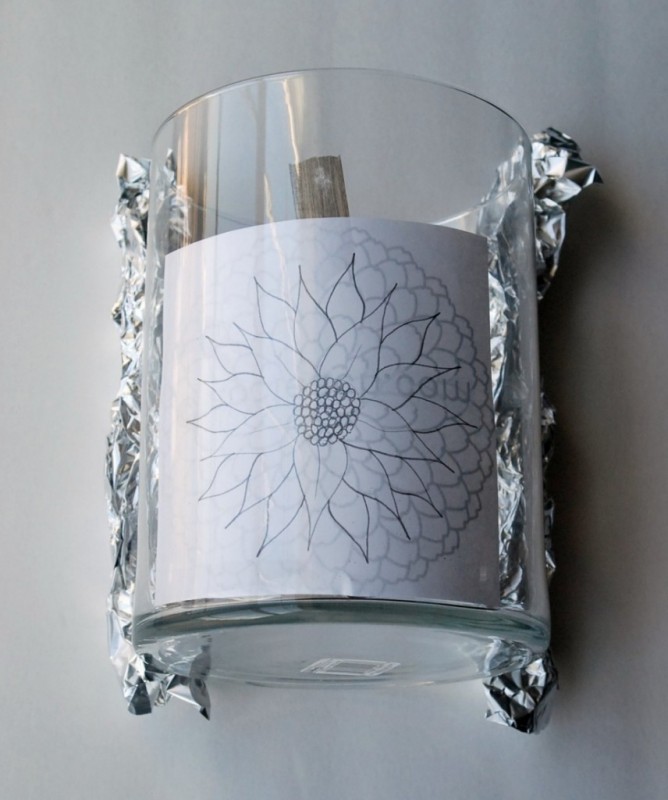
Tape your design inside the vase where you’d like your etching to be. {For my smaller flowers, I just sketched a design on the sticky side of a post-it note and stuck it inside the vase.} If you’re using a round vase, you’ll want to stabilize it somehow so it doesn’t roll all around on you — I used some scrunched-up aluminum foil on either side.
Then, just start squeezing the etching cream on the lines of your design! Be careful and go slowly, because the cream starts to eat away the glass as soon as you apply it, so it’s really hard to fix any mistakes. I think the mistakes add character {at least that’s what I tell myself when it gets jacked up}.
If your squeeze bottle does get clogged, just use a toothpick to clear out the tip. You can use a toothpick to add any fine lines to your design as well. To make the center lines on the petals, I just dragged stuck a toothpick in the cream and dragged it outward from the center.
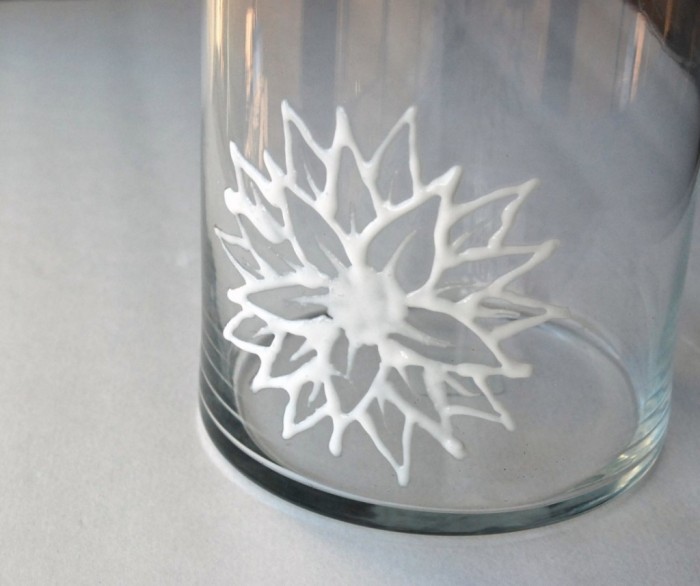
Let the cream sit on the vase according to the package directions {which is usually about 5 minutes}, then rinse off. I recommend wearing rubber gloves for this step, because there are warnings all over the bottle about how the cream could burn your skin. I personally have accidentally gotten some on my hands and it never burned me {obviously, I washed it off immediately}, but I’d still heed the warnings.
You may think it didn’t work very well while you’re rinsing, but once the vase dries, you’ll clearly see the etching!
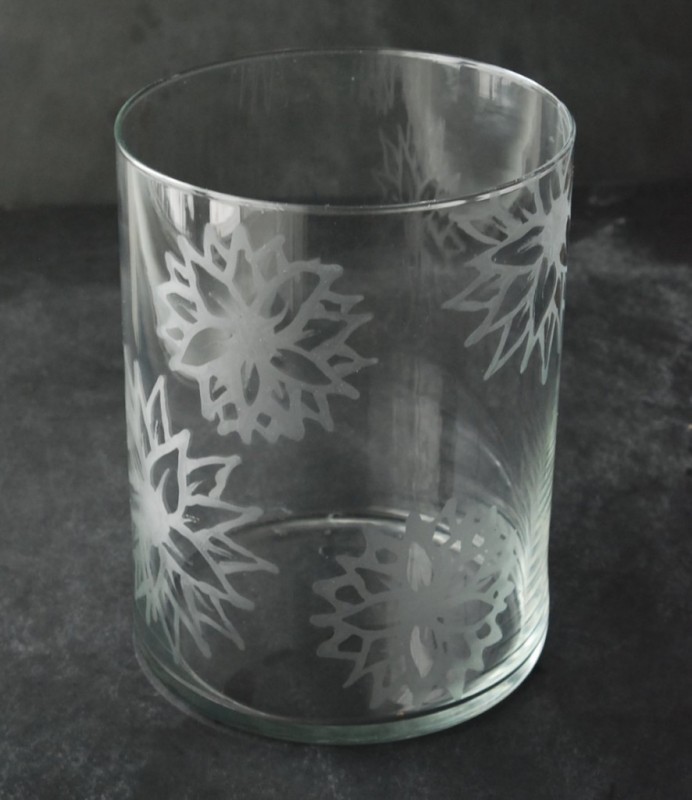
That’s all there is to it! I decided to add a few more flowers, so I did them one at a time so I wouldn’t smudge one while I was working on another.
Can you believe how easy this is?
Thanks again to Julie for letting me be the DIY contributor for White Lights on Wednesday. I love having the opportunity to share some fun DIY ideas each month! For more from me, visit my blog, Endlessly Inspired, and follow me on Pinterest, Facebook, Twitter, and Instagram!