This is a Sponsored post written by me on behalf of FrogTape brand painter’s tape. All opinions are 100% mine.
I don’t know what makes today different, but I’m finally in the Halloween spirit. I mean, it’s my favorite holiday and I always look forward to it, but now I feel like we’re on the final countdown. Maybe I’ve just listened to Europe one too many times with the boys. I don’t know.
I wanted to make something fun and festive for the house. We have TONS of Halloween decorations because of Mike’s holiday displays for work, but I never remember to bust them out. This year though, I’m getting my witch’s hat on in plenty and making this place spooky.
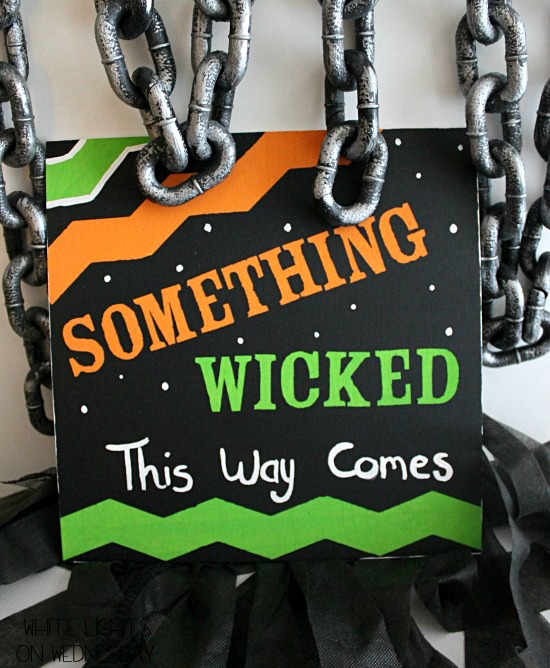
Mike has plenty of tombstones, chains, and creepy hang from the ceiling type guys, but we don’t really have anything to hang on the walls. So I made a sign to pay homage one of my favorite creepy movies, Something Wicked This Way Comes. I went with bright Halloween colors, made it fun with Frog Tape® Shape Tape™ in Chevron pattern, and some polka dots.
The Frog Tape® Shape Tape™ was really easy to use. I have a bunch more projects in made to use it for after this sign going so well. The PaintBlock® Technology saved my project. I was really worried about the black paint bleeding into the lighter colors. I’d have to go back over the lines myself to get a good straight edge – but that didn’t happen. The PaintBlock® Technology reacts with the water in latex paint and creates a micro-barrier that seals the edges of the tape to prevent paint bleed. I used acrylic paint and the edges were pretty much perfect.
Something Wicked Halloween Art
Equipment:
Black, Orange, Green, and White Acrylic Paint
3 foam paint brushes
Wood Plaque (size of your choice)
Mounting brackets or adhesive wall mounts (if your plaque doesn’t come with something to hang it already)
Frog Tape® Shape Tape ™ in Chevron, Wave, or Scalloped pattern
Vinyl Lettering (or you can cut letters out of paint tape like I did)
Fine Tip Paint Brush
Pencil
Method:
Layout your Frog Tape® Shape Tape ™ and letters where you want them to be on your sign.
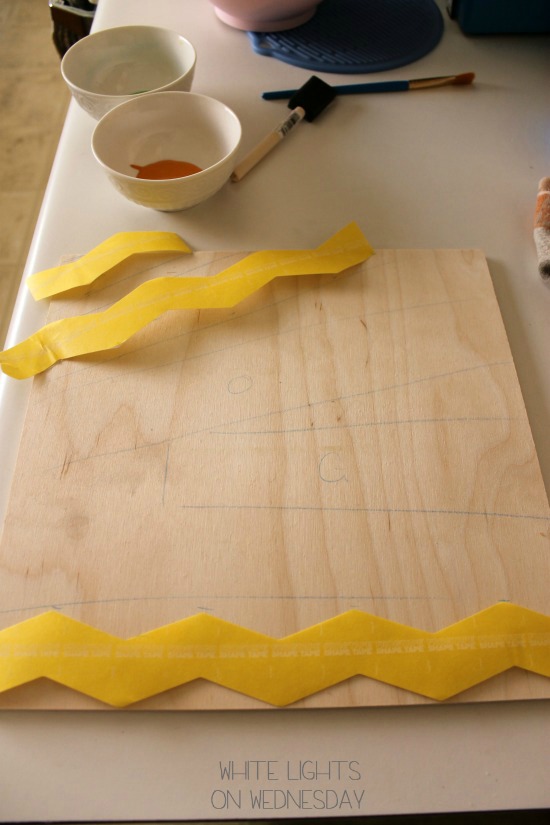
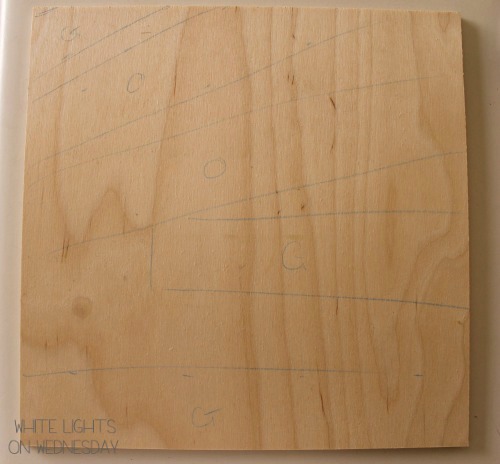
Use your pencil to sketch the outline of the areas where the Shape Tape ™ and lettering will be. Label the areas with the color you want the lettering and patterns to be.
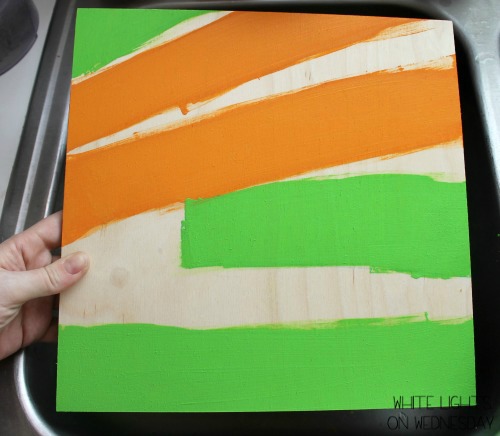
Paint in the marked areas of your sign with orange and green paint. Let paint dry completely. Apply additional coats (at least a second coat), drying between application, until the desired color is achieved.
Place the Shape Tape ™ and letters over the colored areas of the board. Press all the appliques firmly to create a good seal.

Paint over the entire plaque with black paint. Be sure to paint all over the edges of the Shape Tape ™ and letters. Allow paint to dry completely, then apply a second coat of paint; allow to dry.
Peel off Shape Tape ™ and letters. Decorate sign with white paint details. I outlined one of chevron edges with white, and added some polka dots. If you didn’t stencil all your letters in the green and orange (like me) paint the rest of the phrase with white paint. Be sure to give your letters and second coat of white paint.
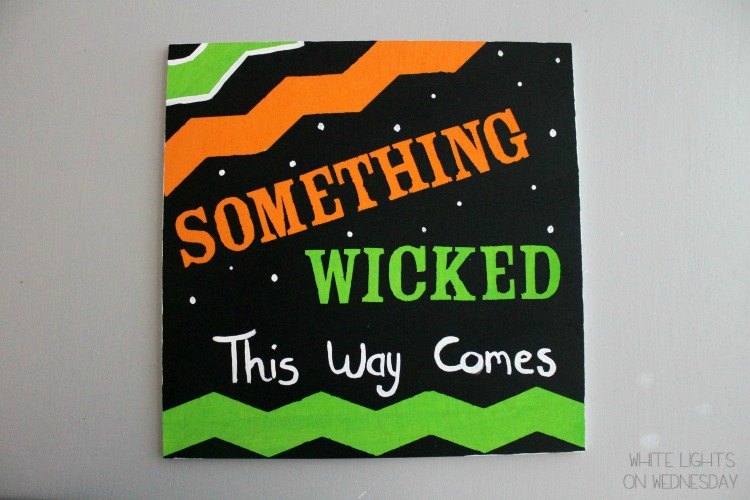
I did the edges of the sign in white as well. It blends into my walls.
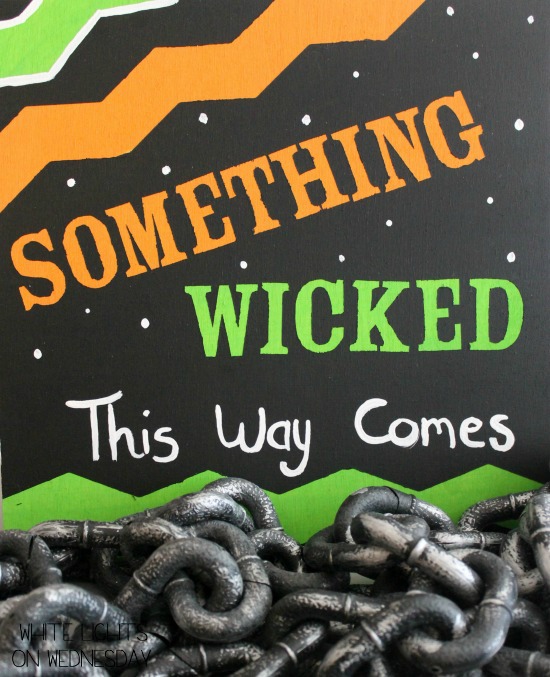
And that’s it. One bright Halloween sign to start your decorating party and give you a little trip down memory lane.

One of the best parts of the shape tape, was that it’s slightly see through when the two-part backing comes off. I can see exactly where I’m placing the tape instead of hoping it was lining up with what was behind the tape. The tape backing comes off in two pieces – that way you can line up half the pattern and then stick the other half down once you’re ready. A bit easier than trying to handle the whole thing at once if you ask me.
You can find more great ideas on how to use your Frog Tape® Shape Tape ™ by following Frog Tape® on twitter. I can’t wait to try some of the ideas in this video around my house!